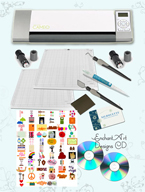
My machine arrived! It’s not as big as I thought, and that’s good, I like to save space in my home. If you are blessed with one, these are my suggestions:
- Open the box and make sure everything is there.
- Read the instructions.
- Install the program that comes in the included CD (follow instructions).
- Go to http://www.quickutz.com/qk2/silhouette/software.aspx and click on “Download Software for the Original Silhouette”. Download the software and install it. You are going to get 50 extra images doing this.
- You may not be able to see the icons for some of your images in the Library; according to QK, you need to do this:
“We apologize that you are presently unable to see the images in your library. In order to resolve this issue, we would direct you to close the ROBO Master software and save the following files to your computer:
http://www.quickutz .com/support/ PortfolioImages. zip
http://www.quickutz .com/support/ 50Images. zip
After saving these files to your computer, locate where you saved them and extract the contents (by right-clicking on them and selecting “Extract All”) to the following location: C:Program FilesROBO MasterQKView Thumbnail
Once you have done this, you may re-open the Silhouette’s ROBO Master software and open your library. Your images should now be displayed in your library.
Thanks,
The QuicKutz Team”
I did this and it worked fine for me.
Now you can start experimenting with your new software, even if you don’t have the Silhouette connected to your computer.
Tags: Quickutz Silhouette


Thank you, thank you, thank you!! Now I can see all my designs again! You rescued me!
Sure! Please let me know if I can help you with your machine. I downloaded Inkscape in order to create my own designs or transforming clipart.
Hmmmm … I tried this (mainly to get the extra 50 images! LOL!) and it won’t work for me. When trying to extract the two zip files, I get “cannot create file” for all of them.
No fifty new images for me I guess! 🙁
Any tips?
If you check again, I will be posting a picture of how “My Library” in ROBO Master should look after you installed the program and unzipped your files that allow you to see the icons for the 100 images. My suggestions are:
1.- Make sure you right click on top of the name of each file in order to get the shortcut menu with the Extract All… command.
2.- If that doesn’t work it may be a Windows problem because the files should be able to get unzipped. In that case, you can download the files again and try to unzip those files.
3.- Check the Permissions for the Folder where your files are installed, especially if you have Vista. To check permissions right click on the folder, select Properties and under the Security tab make sure you have full control of the folder.
Let me know if you were able to do it or not.
Glenda
I followed the instructions above, and I can open and see the image, but they’re GIF, what can I do with those? I was thinking we’d get the images to use like the others. Maybe I did something wrong.
Sandy
Hello: First, open your ROBO Master program and click on My Library. Check if you have 100 images there.
Second, if you don’t see them there, look on Program Files, ROBO Master, Templates. When you click on the folder Templates you are going to be able to see files with the extension .gst Those are the files that appear in My Library and you can cut those files.
Let me know if you still have a problem with that.
Glenda
No, I have 71 as I bought a few files from the store. Under the Templates I have the same 71 also…I downloaded the above like you said but I only see gif files to view. Were we able to download the files to cut given to the original Silhouette?
Make sure that you follow all the steps described on the post:
1.- Install the software that comes with the machine first.
2.- Then, download software for the original silhouette. That is ROBO Master 5.1. Make sure that you also install this update.
3.- If you only see icons on “My Library”, download the other 2 files and unzip those files. Make sure they are in the right location Program Files/ROBO Master/QKView/Thumbnail
4.- Reopen the program.
Now, you should be able to see the images in “My Library”. Should be 100 apart from the ones you bought from their website.
Hope this helps
Okay…so after I install the original then go back and install Silhouette SD? I’m installing the original now.
Thanks,
Sandy
Yes, first install the CD that came with the Sil and then install the one offered in the website. Good luck with that
Glenda
Thank you! I never even thought to email the company (I think I was just so excited I got twice as many images!) I’ve been wanting to organize my non-“Silhouette” brand images – is there a way to get those in the library as well? Otherwise I may just tag them in Photoshop Elements (but I am already switching between 2 catalogs on there when I’m scrapbooking)
Thank you so much for sharing – I did it and it worked!
Hi Jenny: I just posted the answer for your question. If you have any other question, let me know. Have a wonderful day!
Thank you for the helpful info. I have had my machine less than a year. I am not sure I would buy it again. I followed your instructions. I can see the new files in my thumbnail file, but not in My Library with in Robo Master. Also I would love to know if it possible to pull up non-quick cutz files in the library.
Thank you,
Kerry
Hi Kerry: I recommend to just start playing with the images from My Library for a while until you feel comfortable with the settings of the machine. Don’t give up yet. This machine can give you many good times. You can cut paper and also thin fabric using Heat n Bond, vinyl and many other things. If you can’t see all the images, make sure that you follow all the steps on the post. Repeat if necessary. Yes you can put other files in the library also, just make a copy of the .gsd file and change the extension to .gst. I have another post that shows you exactly how to do it. Let me know if you need further assistance. Take care.