Happy New Year to all our friends! We would like to give you, two great digital pages for your enjoyment. You can use them for all your digital projects and even to print them out.
If you are interested in getting the software, use the coupon code STMMMS36086 at My Memories upon checkout, you’ll receive a $10 discount off the purchase of the My Memories Suite Scrapbook software and a $10 coupon for the MyMemories.com store – a $20 value!
Here is a download to the first quick page, just click HERE

The second free digital element, you can download it HERE.

Have fun!

Effective immediately, place your order at Enchant Art and receive a 30% discount on all Silhouette Accessories.
This includes:
Cutting Blades
Cutting Mats
Starter Kits (Yes, including the new Stamp Kit)
Fabric Interfacing
Vinyl
Heat Transfer
Rhinestones
Specialty Media
Adhesive Cardstock.
This pricing is good until January 26.
To take advantage of this offer go to this link:
http://enchantart.com/die-cutting/silhouette-america
No need for a coupon code. The discount is already in effect. If you have any question let me know glenda@enchantart.com
30% de descuento en accesorios Silhouette en la tienda Enchant Art!
A partir de hoy puede hacer su orden de accesorios en Enchant Art y recibir un descuento del 30% en
todos los accesorios.
Esto incluye:
Cuchillas
Esteras o Mats
Starter Kits (sí, incluyendo el nuevo Kit para hacer Sellos)
Interfaz Tela
vinilo
Transferencia de Calor
Piedras
soportes especiales
Cartulinas con Pegamento.
Este precio sera hasta el 26 de Enero.
No necesita ningun cupon ya que esta ya descontado. Si tiene alguna pregunta, me la hace llegar a glenda@enchantart.com
Para ver los productos vaya al siguiente enlace:
http://enchantart.com/die-cutting/silhouette-america

I hope you have a wonderful Thanksgiving and get ready for Christmas and the winter holidays. To help you gather memories, we are bringing you new digital embellishments and papers from the My Memories scrapbooking software. If you are interested in getting the software, use the coupon code STMMMS36086 at My Memories upon checkout, you’ll receive a $10 discount off the purchase of the My Memories Suite Scrapbook software and a $10 coupon for the MyMemories.com store – a $20 value!
The first Digital Kit Anyday Everyday Journal Cards Includes:
- 6 Page Elements

To download click HERE.
The second Digital Kit Butterfly Cluster Includes:
- 1 Page Elements

To download click HERE.
Remember to visit Enchant Art and check out what we have.
Glenda C.

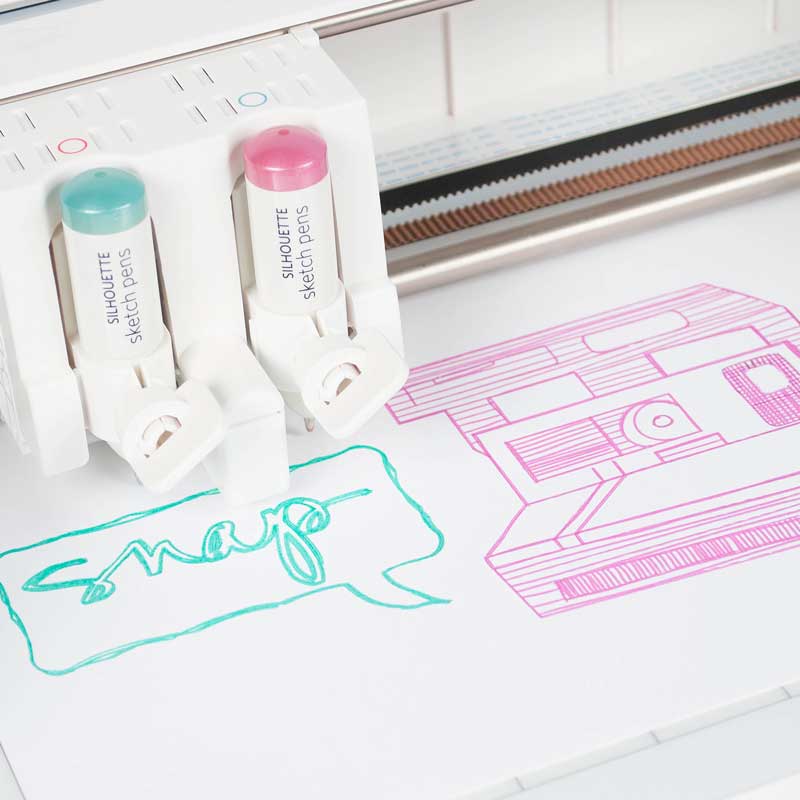
This is the new Silhouette machine, the CURIO
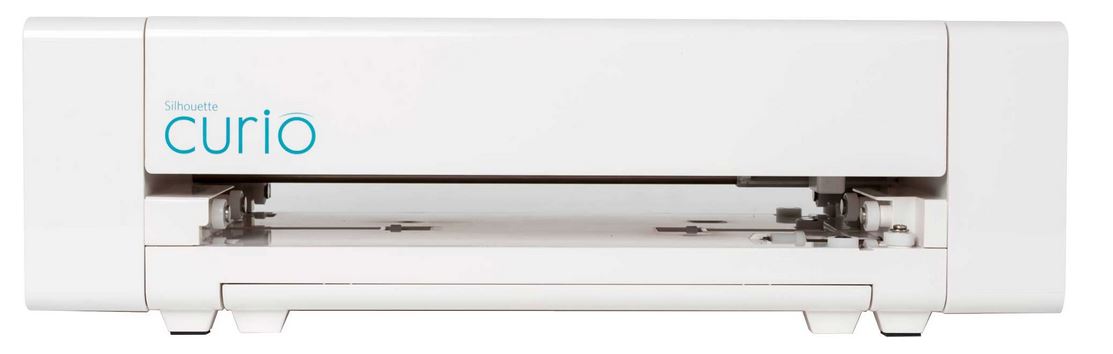
The Silhouette Curio™ hobby machine is the perfect complement to Silhouette’s other cutting tools.
Simply connect the Curio to your PC or Mac with the included USB cable and use the included software, Silhouette Studio®, to design your project.
Then send your project to the Curio to put your signature style on countless DIY projects. With Curio you can:
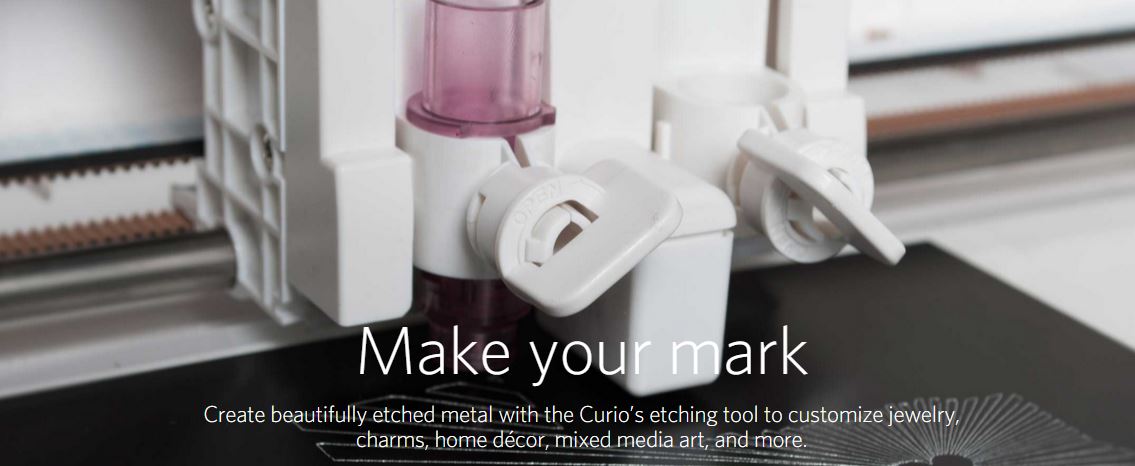
• Create beautifully etched metal (stippling/etching tool sold separately)
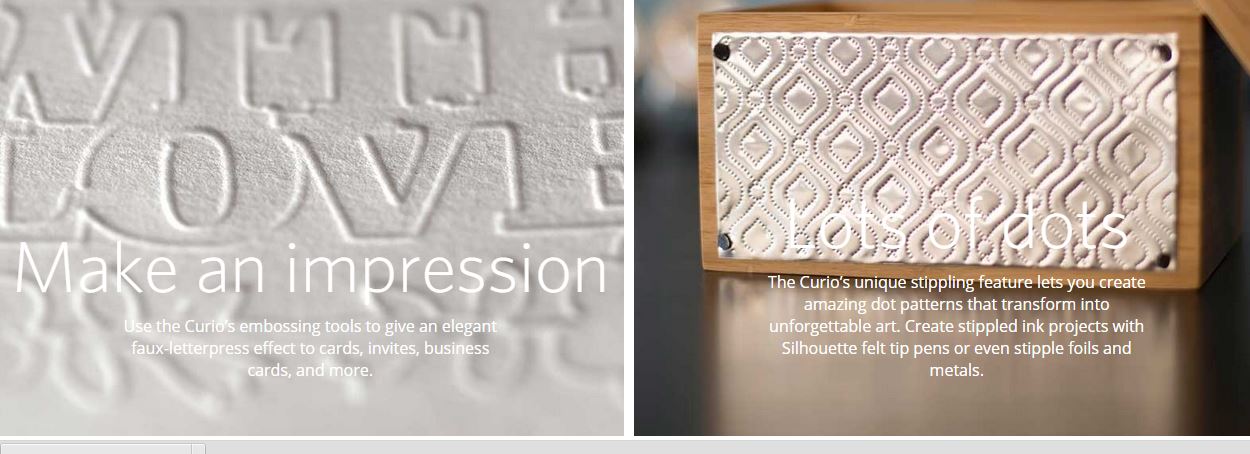
• Embellish foils and metals with unique stipple patterns (stippling/etching tool sold separately)
• Sketch intricate, multi-color designs
• Create one-of-a-kind stippled ink projects (sketch pens and felt tip pens sold separately)
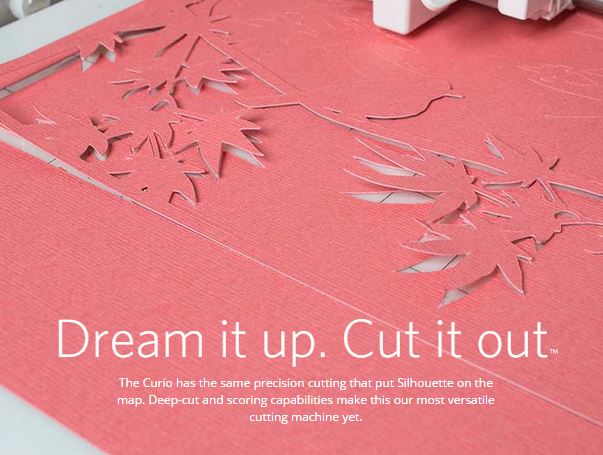
• Cut custom designs out of paper, card stock, vellum, vinyl, fabric, stencil material and more
• Cut or sketch fonts already installed on your computer
• Add embossing or debossing textures to soft papers, vellum and other delicate materials
• Use unique materials as project surfaces such as woods, canvas, metals, and more
• Register and cut printed materials (Print & Cut feature)
The Curio is the only machine that can unlock the stippling, etching, debossing, embossing and dual carriage features in Silhouette Studio® design software.
Contains:
Silhouette Curio™
8.5 in. x 6 in. base (includes four platforms)
8.5 in. x 6 in. cutting mat
8.5 in. x 6 in. embossing mat
Fine embossing tool
Wide embossing tool
50 exclusive designs
AC adapter
USB cord
Silhouette Studio® Software CD
Price for the Curio is: $249.99
When you pre-order your machine with Enchantart you will also receive a gift certificate for $100 in digital files from Enchantart.
Please send us an email to info@enchantart.com to arrange your pre-order.
Glenda C.

This is a small acrylic painting (8 by 10 inches) for my friend Gloria. We enjoy talking and sharing our lives and have been friends for many years. The painting represents our friendship, the road together, enjoying the good times and enduring the hardships with God’s help.


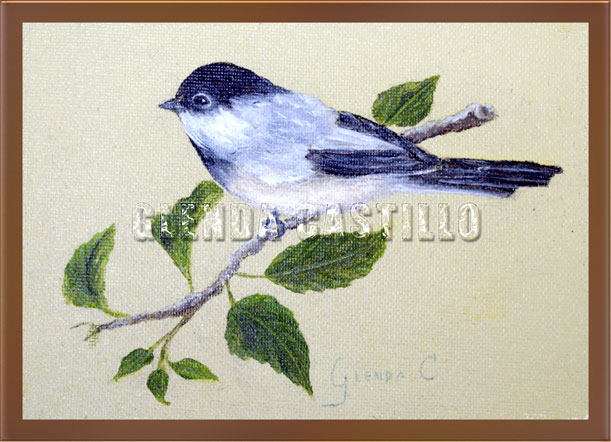
This little and beautiful bird was painted in acrylics.

Today’s deal is the eBOSSER Elec.Teresa Collins PLUS Embossing Folders BUNDLE
This is what you are going to get:
– eBosser electric embossing and cutting machine
– Power Adapter
– Instruction Manual
– (1) Embossing/Cutting Platforms
– (3) Base Platforms
– (1) Magnetic Shim
– (1) Rubber Embossing Mat (1 set)
– (1) 8-1/2″ x 12″ Teresa Collins Embossing folder – About Time
– (1) 8-1/2″ x 12″ Teresa Collins Embossing folder – Sophisticated
– (4) Digital Journaling Cards: “Just Because” from Enchant Art sent to you by email after your purchase. You can print these beautiful cards as many times as you need them.
– $30 Gift Certificate to download Digital files from Enchant Art
– $10 Gift Certificate to buy any item at Enchant Art
Remember to get free shipping with your purchase of $50 or more. Only at Enchant Art.

Tags: eBosser Craftwell, embossing, sale ebosser
We would like to give you, our friends, two great digital pages for your enjoyment. You can use them for all your digital projects and even to print them out.
If you are interested in getting the software, use the coupon code STMMMS36086 at My Memories upon checkout, you’ll receive a $10 discount off the purchase of the My Memories Suite Scrapbook software and a $10 coupon for the MyMemories.com store – a $20 value!
Here is a download to the first quick page, just click HERE

To download the other free page available click HERE

These free pages are available until March 29

Tags: free digital papers
Effective immediately, place your order at Enchant Art and receive a 30% discount on all Silhouette Accessories.
This includes:
Cutting Blades
Cutting Mats
Starter Kits (Yes, including the new Stamp Kit)
Fabric Interfacing
Vinyl
Heat Transfer
Rhinestones
Specialty Media
Adhesive Cardstock.
This pricing is good until January 26.
To take advantage of this offer go to this link:
http://enchantart.com/silhouette-cameo?sort=20a&page=1
No need for a coupon code. The discount is already in effect. If you have any question let me know glenda@enchantart.com
30% de descuento en accesorios Silhouette en la tienda Enchant Art!
A partir de hoy puede hacer su orden de accesorios en Enchant Art y recibir un descuento del 30% en
todos los accesorios.
Esto incluye:
Cuchillas
Esteras o Mats
Starter Kits (sí, incluyendo el nuevo Kit para hacer Sellos)
Interfaz Tela
vinilo
Transferencia de Calor
Piedras
soportes especiales
Cartulinas con Pegamento.
Este precio sera hasta el 26 de Enero.
No necesita ningun cupon ya que esta ya descontado. Si tiene alguna pregunta, me la hace llegar a glenda@enchantart.com
Para ver los productos vaya al siguiente enlace:
http://enchantart.com/silhouette-cameo?sort=20a&page=1
Today, we bring you two different quick pages to use with your digital projects. I use them also when I post a picture in a social media website. Use your imagination and adorn your pictures with this already made pages for you.
If you are interested in getting the software, use the coupon code STMMMS36086 at My Memories upon checkout, you’ll receive a $10 discount off the purchase of the My Memories Suite Scrapbook software and a $10 coupon for the MyMemories.com store – a $20 value!
Here is a download to the first quick page, just click HERE.

The second quick page is available to download HERE.

Available FREE until:
January 25
Glenda C.


