It’s official: Make The Cut has reached a settlement with Provo Craft. This is really enraging; Cricut appears to be the bully in this situation against MTC, which is managed only by the creator of the software, Andy, and his wife.
Why did Cricut start all this? Looks like they want you to buy their products and exclusively those. They want to prevent you to create your own images using a software like MTC and, more specifically, they want to keep you from creating backups of the Cricut cartridges.
What did MTC settle for? MTC is no longer allowed to sell their software that is compatible with the Cricut machines. Of course, if you already own the software, you can still use it.
Who is next in line? Provo Craft also filed suit against Craft Edge, the owners of Sure Cuts A Lot (SCAL) software.
What should we do as customers? I don’t know about you, but this is so bad that many people are going to sell their Cricut machines and search for other cutting machines. People are not willing to keep supporting a company with such low ethics and so much greed. I don’t own a Cricut and I don’t want to do anything with this company. My choice was the Silhouette and I’m very happy with it. I also have the eCraft for bigger projects. But there are also other machines in the market now that allow you to create and share your files. Cricut machines are not the only ones, and you have all the right to choose. That is something that they can’t impose to us.
Do you like the look of the letterpress but don’t want to invest in another machine, special inks, etc? Well, looks like Sizzix in coming out with the Sizzix Ink-its Letterpress Plates.
These plates don’t require that you buy another machine; you can use them with your Big Shot and other die-cut machines. Also, they use inkpads, the ones that you may have or that you can buy wherever you live.
I already have the Big Shot and if I don’t have to buy special inks, I think I would like to incorporate some cool ink-debossed images to my projects. The plates look really nice; some are vintage looking, some are elegant and fancy. Sizzix is going to start shipping this plates by mid-June 2011. Enchant Art will have them available for pre-orders soon.
By the way, do you know the Vagabond is $199 with FREE SHIPPING? Here is more information about it.
Tags: letterpress, plates for letterpress, Sizzix ink-its Letterpress
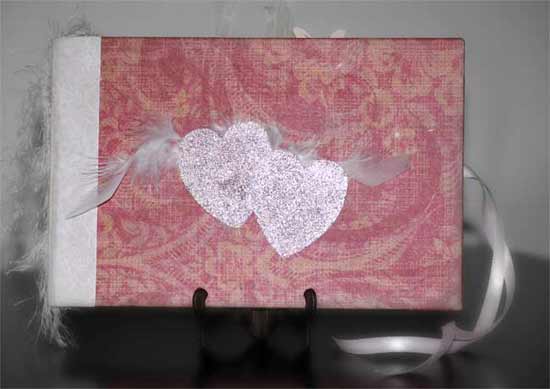
I created this book, Romance, inspired in one of the most wonderful words: “love”. It was constructed with 2 boards, one for the front cover and the other for the back. The spine was cut once I finished with the book, since the spine measured the thickness of the finished book plus 1 inch over the front cover and 1 inch over the back cover.
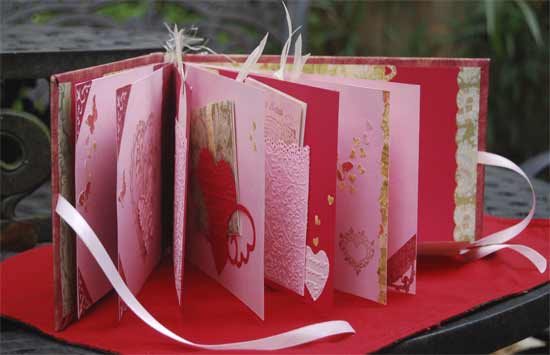
The inside pages were bound using hinges between pages. In order to make your hinges, cut a piece of cardstock 2 inches width and the height of the pages. Then fold the hinge in half lenghtwise. One side will be glued to the inside of the left page and the other side to the inside of the right page. Leave 1/8 ” in between pages.
Keep joining pages until you have all the pages together. Use a very strong glue for this.
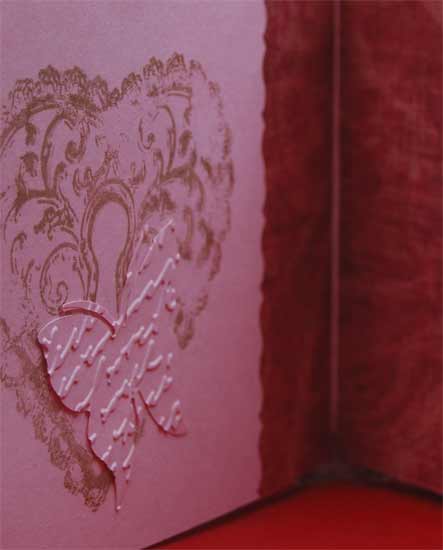
Once you have your book finished it’s time to decorate the inside pages. I used glitter, beautiful papers, stamps, even a mini book inside of the book, etc.
The next step is to adhere the first page with the front cover and the last page with the backcover. Just make sure that everything is aligned.
Then, measure the spine and cut it. Glue the spine to the covers to finish.
If you want more information about this book, you can find it here.
These are more pictures of the inside of the book:
Tags: handmade books, romantic book, romantic gift
My very patient friends, owners of the eCraft, now you have something to celebrate and rejoice: Make The Cut (MTC) has come with a plug-in for the eCraft. With the plug-in, you can cut directly from MTC to the machine. You don’t have to deal anymore with the eCraft software, and this is great news. You can start using the eCraft now without spending your money buying SD cards; there are many free SVG images in the web or very inexpensive ones, carefully created for you–look at the beautiful designs at Enchant Art for example.
If you’d like to purchase MTC, click here. When you are in the MTC website, press the Order Now button to get your software. There are many tutorials available and also recorded webinars that can help you.
I will be getting the program also, considering it as an investment and to avoid myself many frustrations with the eCraft software.
Remember, you can use MTC not just with the eCraft but also with the Silhouette, CraftRobo, Cricut, etc.
Special Offer: If you order the MTC through my blog, you will get $10 of digital cutting files FREE from Enchant Art. Just e-mail the order ID to info@enchantart.com, and I will e-mail you the files. In the e-mail, you can enter the names of the digital cutting files that you prefer.
If you have any question, please let me know.
Tags: Make the Cut and Ecraft, mtc, MTC and Ecraft
I just want to pass a dicount code for the Silhouette designs subscription. When you are in the step to add your code, type Enchant Art to receive 10% off.
Happy cutting!
Tags: code for Silhouette SD designs, coupon code for Silhouette subscription
I’ve been using the Silhouette for some time now and I’ve enjoyed using this cutter for different crafts, books, cards, etc. I think it’s a great tool if you want to cut letters, titles, designs, and more without using scissors. I’m impressed with the fine details that this machine can cut, as well as its ability to draw my designs by pen.
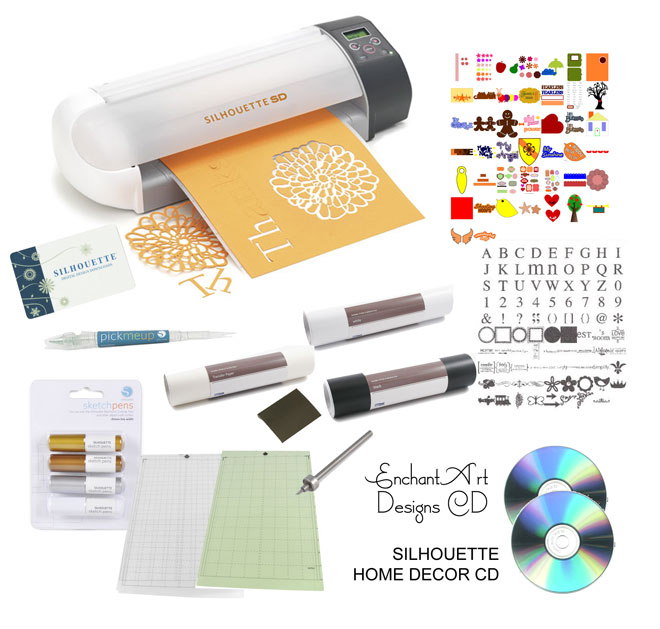
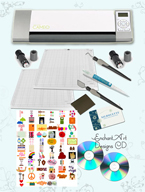
After a lot of consideration, I decided that it was time to offer the Silhouette in my online store. I have bundled it with so many wonderful things like vinyls, metallic pens, design CDs from Silhouette and from Enchant Art, transfer paper, and more accessories. On the Enchant Art Design CD, I’m including so many of my favorite designs there that you will be impressed.
Together with all these fabulous things, my customers also have my customer support just an e-mail away.
Take a quick look at all the goodies that are included in the package:
For more information on the bundle, you can click on the image above or click HERE.
This package would be a great buy for yourself or to give away to a special person.
Visit Enchant Art to see other related products.
Happy cutting!
Tags: Silhouette America, Silhouette SD
We were having significant problems getting the eCraftshop Pro software program to work in Windows Vista. When we tried to cut to the eCraft from the software (by clicking on the Cut to PCD icon), we would repeatedly get an error message saying “Either port is not connected properly or PCD may swtich off,” and the design would fail to cut at all. Nothing would cut from the computer.
After some testing on the Windows Vista computer, we at Enchant Art figured out that the eCraft driver had failed to install, even though the driver installation program had said that the install was successful.
If you have Windows Vista and you can’t cut to the eCraft from your computer, this is what you should do to resolve the problem:
1. Click on the Start button on your desktop, right-click on Computer and select Manage. (Remember, right-click on Computer, don’t do a regular left-click.)

2. In the Computer Management window that opens, click on Device Manager.
3. Under Universal Serial Bus Controllers, you will see displayed CP210x USB Composite Device. Unlike the illustration here, you will probably see a yellow triangle with an exclamation point; this means that the device is not working correctly. Right-click on CP210x USB Composite Device and select Properties.
4. In the General tab, under Device Status, you will see that it says: “This device is not working properly” or something to that effect. Click on the Driver tab and click on the Update Driver button.
5. In the next window, click on “Browse my computer for driver software.”
6. When you first attempted to install the eCraftshop software, one of the steps in the installation instructions was to extract the folder CP2101_Drivers. In this Update Driver Software window that you now have in front you, click on the Browse button and browse out to the CP2101_Drivers folder that you had previously unzipped. (If you don’t have that folder, click HERE to go to the eCraftshop registration page, log in with the same name and password that you used to previously register the software, and then click the Download button in Step 2.)
7. Click on Next. Windows Vista will then access the CP2101_Drivers folder and use that to install the drivers correctly. When it finishes, close Device Manager and restart eCraftshop. You should now be able to cut to the eCraft by clicking on the Cut to PDC icon.
Remember to have the eCraft machine connected and turned on throughout this whole process. Good luck!
Tags: eCraft, eCraftshop Pro, error, Vista
Please take a look at this announcement from Silhouette America:
Notice of Download Card Discontinuance
It’s been an entire year now since Silhouette America was born and separated from QuicKutz, Inc. We’ve been growing at a tremendous rate and are excited for some new upcoming products, partnerships, and promotions. As a natural part of our growth it’s time to discontinue the Silhouette download cards created under the QuicKutz brand prior to October 2009.

If you have a download card with a QuicKutz logo on it, be sure to apply it to your account balance in the Silhouette Online Store by December 31, 2010. If not applied to an account, these cards will no longer be valid after December 31, 2010. Once your card is applied to your account the credits will remain there until you decide to use them and will NOT expire at the end of the year.. All other Silhouette download cards will continue to be valid. Only those with the QuicKutz logo will be discontinued on this date.
How to Use a Download Card
If you have a download card and you’re not sure how to apply it to your account balance, follow these simple steps:
- Run the Silhouette software (Silhouette Studio™ or ROBO Master)
- With a new document open, click the Online Store (or Purchase Online) button in the toolbar on the left
- Sign in to the Silhouette Online Store by creating a new free account, or using your existing username and password
- Once you’ve signed in, click the My Account link displayed at the top of the window
- Click the link to Apply a Download Card to my Balance and follow the instructions on that page
- Once the download card has been applied to your balance, you may throw it away
You can use your download card to download new cuttable designs for your Silhouette. There’s no cost or subscription to use your download card, so what are you waiting for? Create your free account and make good on those free shapes.
Silhouette America, Inc.
I just received my eCraft and I’m very impressed:
- The machine has a different look from the prototype machine that I tested some months ago. The outside looks very similar but once I opened the cover, I discovered many improvements.
- I cut some images from the Fundamentals 1 SD Card and since some of the images are simple to cut, I didn’t need any tabs that connected the cut piece with the rest of the cardstock. The cut came out clean and detached completely.
- My machine is not as loud as the prototype machine. I think my family can sleep well through any cutting.
- Even though I had used the machine before as a tester, I had to revise and re-learn how to use it since there are new components in this machine, like the adjustment of the pressure for the blade. It looked confusing to me at the beginning. Now, after experimenting a little, I know the basic settings: thin paper, vinyl uses the number 2 or 3, regular cardstock (80 lb) around 6 to 7, chipboard (like cereal boxes) will use an 8, which is the maximum level.
- There are some tricks to learn. For example, if you want to cut thin paper, load your thin paper together with a cardstock and use a low number for pressure (2). The machine will then cut only the thin paper and leave intact the cardstock. Another little trick is to be able to take out the blade cover in order to expose it more for cutting thicker materials. This may be necessary with some chipboards.
- Now, the software that comes with the machine is another issue. I don’t think is ready for the general public yet. It can be frustrating for anybody to deal with the many glitches that are present in the software and that Craftwell says will fix by November 12. Hopefully they will do it, since the machine is really good and deserves a better software to accompany it. In my case, it’s not even communicating with my computer, a problem that I may try to solve tomorrow. Otherwise, I will wait patiently for the upgrade.
- Please take a look at this tutorial from Craftwell and see for yourself the potential of this machine. If you are considering purchasing this cutter, check out this special offer here.
Let me know if you have any question, I may be able to help you.
Tags: ecraft craftwell review

