Following up with my post “Set Up the Cut Area in Inkscape”, I was playing again, trying to have as much cutting space as I could. So, I came out with these settings:
- Document Size: 8.5″ by 11.69″
- Settings for Red Outlined Box:
- Width: 8.052
- Height: 10.600
- X: 0.228
- Y: 0.600
If you notice, these settings allow you to cut a 8″ wide design. I’m very happy with my results. Give it a try and let me know! And yes, I’m still playing with the Silhouette Studio software, which I like so far, just waiting for the updates in November.
Tags: inkscape tutorials for digital cutters, Red box in inkscape
We are all excited with the release of the new software for our Silhouettes, SS (Silhouette Studio). I would like to give you an overview of some of the features that may interest you and me. Let’s start with the positive:
- You can install SS and keep the ROBO Master, since they are different software applications.
- Ability to see the “mat” by moving the Reveal Carrier Sheet slider. That is really cool; we can see exactly where we are going to cut and position even a scrap of paper in the right place. I noticed that when I go away from the Page view (the first one when you open a design), the mat disappears. If you want to see it always, you have to go to File, Preferences, Defaults.
- Ability to see the size of the design in the work area. Also, you can resize the design and will it show you the changes in the work area.
- Ability to create your shapes with more options than the ROBO Master software.
- You can Fill your shapes with Colors, Gradients and Patterns (second group of icons at the right of the screen).
- One of the best features so far for me is the Simplify option, which gets rid of the extra nodes that some designs have when you convert a .jpeg image to a cuttable design.
- Easy just to print without cutting. If you want to send your design to the printer instead of the Silhouette, click on the seventh icon (the one with the scissors) and click on No Cut.
- If you want to import your own designs to My Library, go to File, Import to my Library…. , in the Files of Type drop-down menu, choose .gsd. Your .gsd files will appear, find the .gsd file that you want to open, double-click on it and it should appear in My Library screen. It will give you the option to add some keywords to the file so you can run an easy search of it later.
- The ability to switch back and forth between the cutting area, My Library and the store using the icons at the left of the screen.
- Very easy to organize the designs in My Library. Right-click on the My Library folder and click on New Folder. Give that folder a name, then go back to Show All Designs at the top and click, hold down the mouse button and drag the design to its new location.
Now I want to let you know of some of the difficulties that people are finding with the new software:
- Some .gsd files don’t open when you try to import them and an error message appears. This has happened to me also with some designs, an unsolved mystery since I was able to use the Import to my Library… function with some files and not with others.
- When you open one of your designs, the Line is set to 0 and you can’t see it. In order to change this, select your design and click on Object, Style, Line Style and move the Thickness of the line slider or choose the 6th icon on the right to get the same selection.
- You can’t import .dxf files or auto trace images until their upgrade in November. If you need to do that now, just use the good ROBO Master, cut from it, save it as a .gsd and then open the .gsd file with the SS.
- When you create something with this software, it will be saved as a SS file ( .studio), not .gsd. This makes life a little bit difficult for people that want to export the file to use it in other machines.
If you have an specific question, click on Help, User’s Manual and it will open a pdf file with good instructions.
So far, I really like this software, not just for what can do now but for all the things that it will do when updates are released in the future. My advice: play, play … play, don’t be afraid of messing up anything because you won’t.
Trust me, this program is really good. And …. it’s free!
Tags: how to use the Silhouette Studio software, review, Silhouette Studio
Looks like we have a new software for our Silhouette machines. That is really great since the ROBO Master program is so basic that can be frustrating to work with it.
This is the announcement from Silhouette:
Announcing Silhouette Studio®
Guess what? We’ve got completely new software for your Silhouette. It’s called Silhouette Studio® and it’s available as a FREE download on silhouetteamerica.com. It’s compatible with Mac® and PCs and is generally pretty awesome. We’ve made some major improvements to the speed and usability so it’s easier than ever to use your Silhouette. Go on and download it today.
This free download is a preliminary version of the software that will be upgraded periodically throughout the rest of the year. The software will let you know when updates are available as we add new features. By the end of the year, Silhouette Studio® will include all the same features as ROBO Master plus some very cool new ones, and it will continue to be free for all Silhouette users.
I’ll donwload it and make some reviews about the software and capabilities. Stay tuned, my friends!
Tags: new software for the Silhouette, Silhouette Studio new software
Many people are experiencing troubles opening the Silhouette designs. Looks like there is a glitch when downloading the files. These are the possible solutions that Silhouette is giving:
Dear Customer,
We have become aware of a glitch in the Silhouette Online Store during the past weekend between Friday around 3pm MDT and Monday around 10am MDT causing files to download incompletely. We have located and corrected the problem and would like to provide you with a resolution if you have not yet received one.
If you are receiving an “Invalid .GIF signature” error when opening My Library, you may have been affected by this glitch and will need to sign in to the Silhouette Online Store and recover any orders placed between Friday afternoon and Monday morning. This can be done by clicking on “My Account” from any screen and then choosing the “My Download History” link. Click on an order during the affected time and then click the button labeled “Recover order”. These steps should resolve this particular error message.
Since each account is limited as to the number of recoveries one can make, we have already increased your recovery limit to account for this mistake. Please accept our apologies for any inconvenience.
We will have new software being released in the upcoming week which will aid tremendously in preventing these issues in the future. Thank you for supporting Silhouette.
Best Regards,
Silhouette Customer Support
And this is the other e-mail from the company:
Dear Customer,
We recently sent an email in regards to the “Invalid .gif Signature” glitch in our systems over the past weekend. We have already had considerable success with most Silhouette users by following the steps provided. If you haven’t been able to correct the problem yet, here are the various solutions available:
Option 1
If you don’t have too many designs, it may be easiest to recover all designs in your download history. First, open My Computer and navigate to C:\Program Files\ROBO Master\QKView\Thumbnail or C:\Program Files (x86)\ROBO Master\QKView\Thumbnail. Delete everything in that folder. With that folder empty, sign in to the Silhouette Online Store, click on “My Account” from any screen, and then choose the “Recover All Downloaded Designs” link. Type your password to continue. You will need to have the newest version of the Silhouette Online Store in order to download fonts properly.
Option 2
If you have thousands of designs, it may be faster to manually remove the incomplete .gif files causing the problem. Do this by opening My Computer and navigating to C:\Program Files\ROBO Master\QKView\Thumbnail or C:\Program Files (x86)\ROBO Master\QKView\Thumbnail. Next, in the view menu, choose “Details”. When the files are listed with their details, click on the column header labeled “Dimensions” to sort by that attribute. You should delete any files that have a blank space where the dimensions should be listed (i.e. the dimensions should read “100 x 100” for each file). Also sort by the “Size” column and delete any files with a size of “0”. After removing these corrupt files, you may recover them in the Silhouette Online Store.
Option 3
If you don’t have time to recover files right now, you can still use My Library in search mode. Open My Library and click on OK to ignore the “Invalid .gif Signature” error. Then click on the Search tab at the top of the window. Once the search menu has appeard, close My Library. When My Library is opened again, it will load search mode successfully without any “Invalid .gif Signature” errors. You will only be able to use My Library in search mode until the problem is corrected.
Please be patient as we assist everyone with their individual concerns. We will have new software being released in the upcoming week which will aid tremendously in preventing these issues in the future. Thank you for supporting Silhouette.
Best Regards,
Silhouette Customer Support
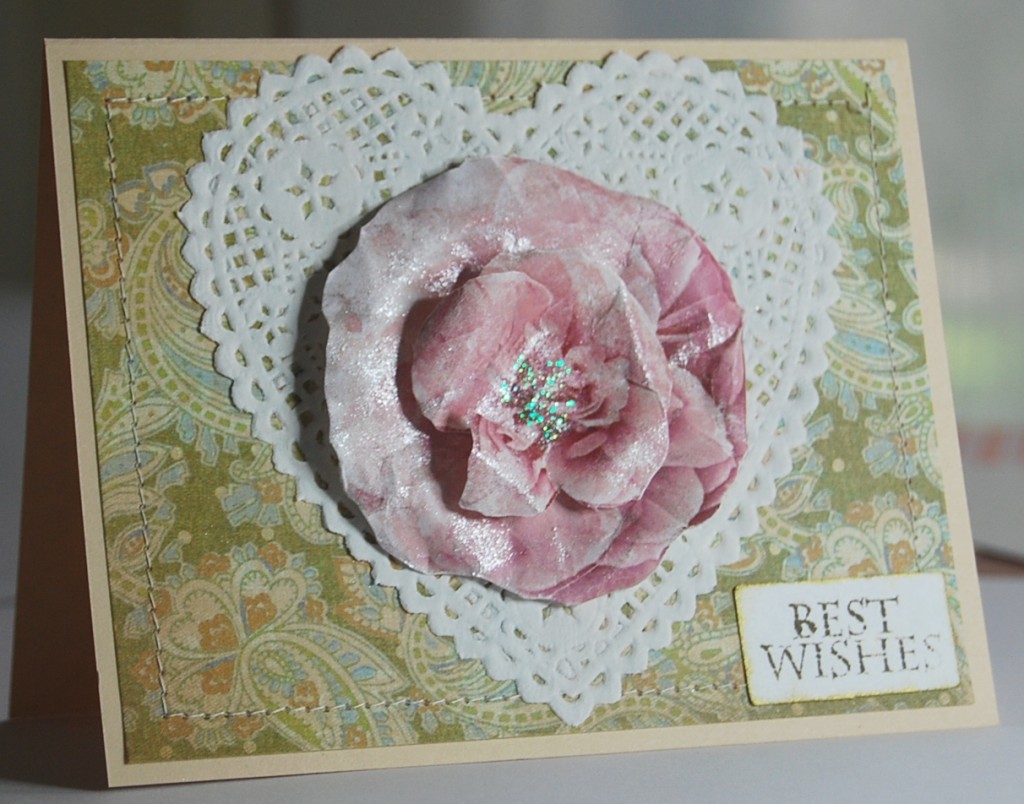
I want to present you with this easy but elegant greeting card that has a very interesting 3D effect. Let’s start:
- Use any size of a blank card or make one yourself by cutting a letter size cardstock in the middle and then folding it. You’ll get 2 cards from one sheet of cardstock.
- Decide the background paper that you want to use. Cut this paper a litte bit smaller than the front of your card.
- Glue the paper to the front of the card. Optionally, you can then stitch around the edges of the decorative paper, as I did with my card.
- Glue a heart dollie onto the decorative paper.
- Prepare the flower:
- I used one of the roses from the Parade of Roses digital file, which you can purchase here.
- Print the flowers using white cardstock.
- Cut the flowers. I like these roses so much, since I can’t cut very straight and these roses look much better if you cut the edges irregularly. They look more realistic that way. I cut out two roses of the same size, but I trimmed the outer petals of one to make it smaller.
- In order to give them more body, I wet them and molded the petals using my fingers. I also brushed some pearlescent medium on top of both roses to add some glimmer.
- Once the flowers were dried, I glued together the smaller flower in the center of the bigger flower with foam tape.
- For extra embellishment, I added some glitter in the center of the top petals.
- Glue the flower over the heart dollie, using foam tape to add more dimension.
- Stamp the sentiment onto a small tag and ink the edges with a gold inkpad.
- Glue the sentiment to the card.
- The card is ready. You only used five elements: the base cardstock, the decorative paper, the dollie, the flower and the sentiment. The beautiful 3D flower makes the card outstanding.
Try to do it using any of the beautiful flowers from Enchant Art; you can take a look at more enchanting flowers by clicking here.
Tags: 3D cards, handmade cards, romantic cards
Today, I’m bringing another book that I made. This time it is “Rhymes”, a book about legendary small tales that go from generation to generation.
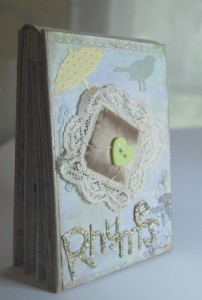
I’ll explain the process that I used to put it together. You can use the same approach to make your own handmade book, customizing it to fit whatever you want to express.
- The first thing that I look for is a good base, in this case meaning beautiful background papers that inspire me to create.
- Now, I decide the title and the content. After that, I decide on the size of the book. I also think about some materials that I’m going to use, but I leave ample space for future creativity.
- I gather my basic materials: chipboard and papers, and then I cut them to the appropiate size.
- Next, I prepare the covers. In this case, I decided to paint the back cover using acrylics and I used paper for the front cover. The painting on the back cover had to reflect the fantasy mood and colors from the beautiful papers that I used for the front. I painted the edges with gold paint.
- For the individual pages, I first glued the chipboards to the designers’ paper. Once dried, I used the sewing machine to stich the chipboard and designer paper together. This makes the pages sturdier and gives them more of a finished look.
- The pages were then treated with gold paint at the edges and other paint on the papers.
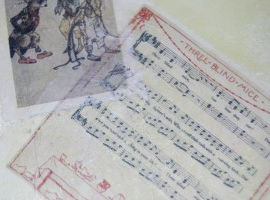
- I proceeded to print the quotes on vellum and the vintage images on tissue paper. To print on tissue, I backed the tissue with normal copy paper and masking tape, and then I ran it through the printer. The image below displays two vintage images printed on tissue paper, which provides a unique and delicate touch.
- Then, I designed and cut the photo corners, also doing the same for all the diecuts for the pages.
- I organized all the pieces on each page and then attached them using different kinds of glue, depending on the object. Many or most of the pieces had glaze, glitter and/or paint applied to them. The image below shows a finished page, with the vellum quote, photo corners, printed tissue paper and button embellishments all glued onto a sewn page.
- When everything was dried, I put all the pages together and measured the thickness in order to know the measurement of the spine of the book.
- I cut the spine using some faux leather and glued it to the front and back cover.
- I then glued gold tissue paper onto the inside of the covers.
- I made an accordion fold piece with cardstock and glued the pages inside each fold.
- I attached the front piece of the accordion to the front cover and the back piece to the back cover.
- I created more details for the book, like a small pillow for the front cover, and applied glitter to the title.
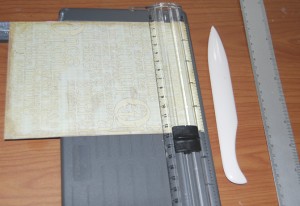
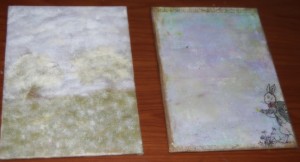
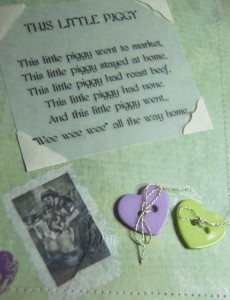
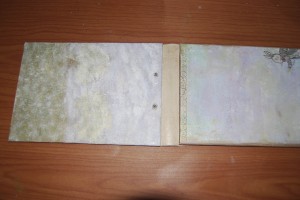
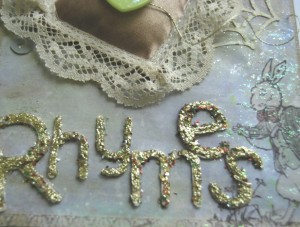
This book is a labor of love; lots of materials and thinking were into its production. If you want to see more pictures and information about my “Rhymes” book, you can click here.
Tags: book making, how to make a book, mini book
Books with ornaments, especially the ones with metal details, are one of my favorite things. I thought how cool it would be to be able to attach metal corners to my handmade books. These corners are not just decorative but they protect your book also. The problem was that I didn’t know how to do it, what tools to use, etc.
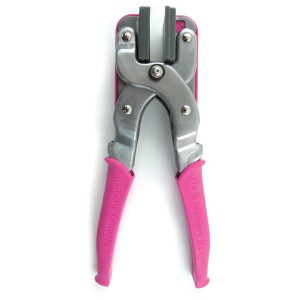
And then, We R Memory Keepers came with the Crop A Dile III, the new tool that can attach metal corners but can also emboss and die cut. I thought this was very interesting. Here is a picture of the Crop A Dile III:
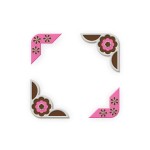
Looks like you will be able to squeeze the handles and do different tasks. Take a look at an example of the corners that will be available:
If you want to see more of the CAD III or if you want to pre-order it, click on the link here and check it out yourself . The store is having a huge discount for early buyers.
I can’t wait to get mine and start playing with it. Fun, fun, fun!!!!
Tags: bookcorners, crop a dile III, decorative corners, protective corners, we r memory keepers
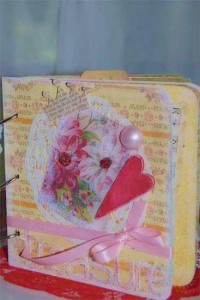
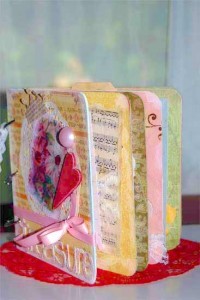
I’ve been busy creating new handmade books. They are perfect for a gift or just to look at them and get inspired. I created “Treasure,” inspired by romantic vintage images, papers, laces, etc.
The first thing that I did was to determine the size of my book. A 6″ by 6″ size is great. Then, I cut all the pages using chipboard, and I did the same with the beautiful paper that I used to cover the chipboard.
Using a glue stick, I glued together the designer papers and the chipboards. Then I painted the edges of the pages with coordinated paint, to give them more personality.
When everything was dried, I rounded the corners to make them look nicer. Next, I made a template where I wanted the holes for the binding rings and use it for making the holes in my pages.
Then the fun increased when I chose the details for the cover and for the pages. Each page is different and unique; I know I’m not going to reproduce this book, it has its own personality and life.
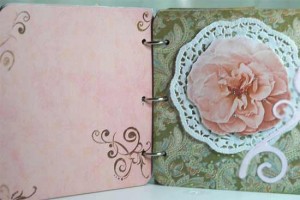
For one of the pages, I cut one of the flowers from my Parade of Roses design. I just printed the page using heavy cardstock and used a light pink for this project. I positioned the rose over a dollie. Also, I added some die cuts for embellishments to the page. Remember to use foam tape or something like that to give more dimension to your project.
I made some flowers with paper and assambled them together, topping them with a button. I added glimmer to the petals to make them shiny.
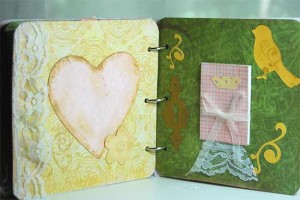
I created a very small book for the owner to write their little secrets. The mini-book is tied to the page with a ribbon.
I kept adding more and more embellishments, paints, die cuts, etc. Also, there are stamped images all over, just to change the background a bit and make this book more unique.
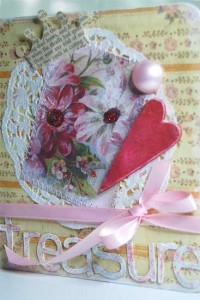
The front cover has chipboard letters, a vintage image sewn to the dollie, a soft pink pearl, ribbon, a thin wooded heart and a crown cut from an old book.
One of the pages is made from a vellum envelope, again treated with stamps and embellishments (it’s a good idea to include an envelope for the keepsakes). Another page has a tag that comes out.
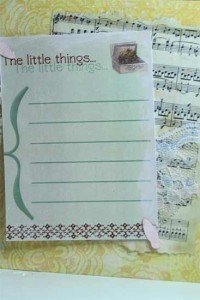
Also, I included some journaling spot using one of the vintage package jounaling cards from Enchant Art. Behind the journaling card, there is a piece of lace and a small sheet of music.
Then, I use different kinds of glitter to accent most of the objects in the pages and cover.
The idea is to insert as many variations as you can to make your book complete without overwhelming the full structure.
When I was happy with my creation, I put all the pages together using three rings at the edge.
If you’d like to purchase this unique book, click here to go to my store. You will be inspired by the beauty and soft vintage look of this book.
Tags: glitter, how to make a mini book, Romantic Mini Book, vintage images
I’m sure you are anxious to see the new video from Craftwell explaining a little bit more about the machine. Please take a look and decide by yourself.
I don’t think all the shapes that they show here are from the eCraft (for example the center of the flowers) but this is a good video if you are considering the eCraft as an option.
Tags: craftwell ecraft cutting machine, video ecraft craftwell
Summer 2010 is the time that Craftwelll will release the eCraft. I hope you are happy and with lots of expectations for this new addition to the arts and crafts world. Think about a digital cutter machine that won’t need the sticky mats and can cut heavy materials 12 inches wide and no limit in length.
Yes, we have to wait a little to see if it lives up to all our expectations, but I have the feeling that it will. To me, it is an almost a complete machine (there is no such thing as a “perfect” machine in life) since it will come with a basic software that will allow you to modify the images from the SD cards and also—if you’d like to create your own images—you will have the Pro version of the software which will open .SVG images.
Another detail is that it will also run with batteries, so you can take it to different places without worrying about connecting it to an outlet.
Enchant Art may sell the machine and if we do, we will give extra special prices to our blogger friends. Just register and I will send you any news about it.
Nobody has seen the latest models, but I have a feeling that not only are the colors cool, but we are going to get a wonderful tool for our creative trips in the world of arts and crafts. Besides, I can’t wait to share some files with you once everything starts rolling.
For now, have patience and wait, the eCraft is very close to being released to the public.
Tags: ecraft craftwell

