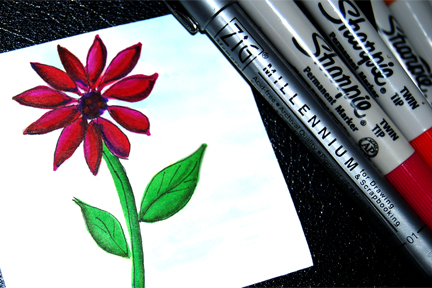
Sharpies are like the popular and costly Copics; they are permanent markers that you can use to color your images, but cheaper than the Copics.
Like the Copics, when you apply the color to a drawn or stamped image, you will be able to see the lines of the original image since the ink is translucent. This is how I use the Sharpies for a very spontaneous drawing:
- I stamp or draw an image. In this case, I used my Zig 01 black pen to draw a fast flower. If you are going to stamp the image, use a pigment ink pad and if you are meticulous with coloring inside the lines, you can heat-emboss your image with clear embossing powder and a heat gun.
- Choose the colors to use. In order to achieve a gradient look, you need to use two or three shades of a color or colors that coordinate with each other.
- Start using the lighter shade of the color, applying it over all the area for that specific color (for example, to the entire area of a flower petal.)
- Take a darker color and apply it to the edge of the image where you want to have the shadow.
- Take the lighter shade again and go over the area where you applied the darker color and try to blend them together.
- If you have a third color, the darkest, apply it to the very edge and again, using the lightest color, blend them.
- Remember that you are using markers that dry fast, so you have to work fast to make them blend more naturally. You want to work on a wet surface for better blending.
- Repeat any coloring as necessary. The markers are not going to damage your paper since the ink evaporates faster than the water-based markers.
- Now, I want to add a few notes:
- Sharpies and Bic markers are expanding their range of colors; however, the Copics still have almost every color that you can imagine.
- If you are an artist that will be coloring using only this medium, then experiment with the Sharpies but keep in mind that Copics and other brands of more expensive markers are refillable and you can use the same pen over and over. Copics also are easier to blend together.
- If you like to paint with different mediums, get the Sharpies and play with them. It’s fun and very easy.
- One more thing: Use a blender pen if you want to remove color from an area.
I hope this opens new windows of creativity for you. If you have any photo of your creation, send it to me and I will publish it in this blog.
Tags: copic markers and sharpies, how to color stamps with sharpies, using sharpies to color stamps
I want to explain an easy and fast way to apply a border (any color you want) to your photo:
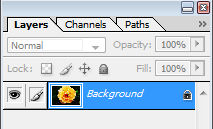
- Open Photoshop.
- Open a photograph of your preference.
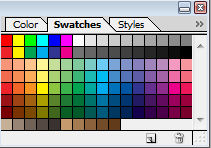
- In the Swatches palette, click on any color of your preference. This is going to set your Foreground color. Press the letter X on your keyboard to send the color to Background.
- Now go to Image, Canvas Size to change the canvas dimensions and add the border. If you want a 1/2 inch border, then type 0.5 for Width and Height. Remember, you can increase or decrease the size of the border just by experimenting with different numbers for width and height. At the bottom of the window you can choose to use the Background, Foreground or other colors.

- You can add another border by repeating the same process. Experiment with different sizes and contrasting colors.
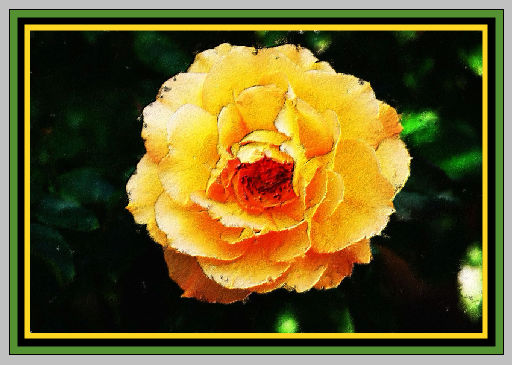
- When you’re finished, you can leave it like it is or you can include it to a bigger layout. When you apply the photo to a larger background, you can add shadows or other effects until you get your own piece of art.
Tags: how to add a frame to a picture, how to make a border to a photo using photoshop
This may sound basic, but it’s important to know. I want to write about the different ways that you can change the size of an image. First we need to know the actual size of an image and then how to resize it:
- Open a file or choose an image from My Library.
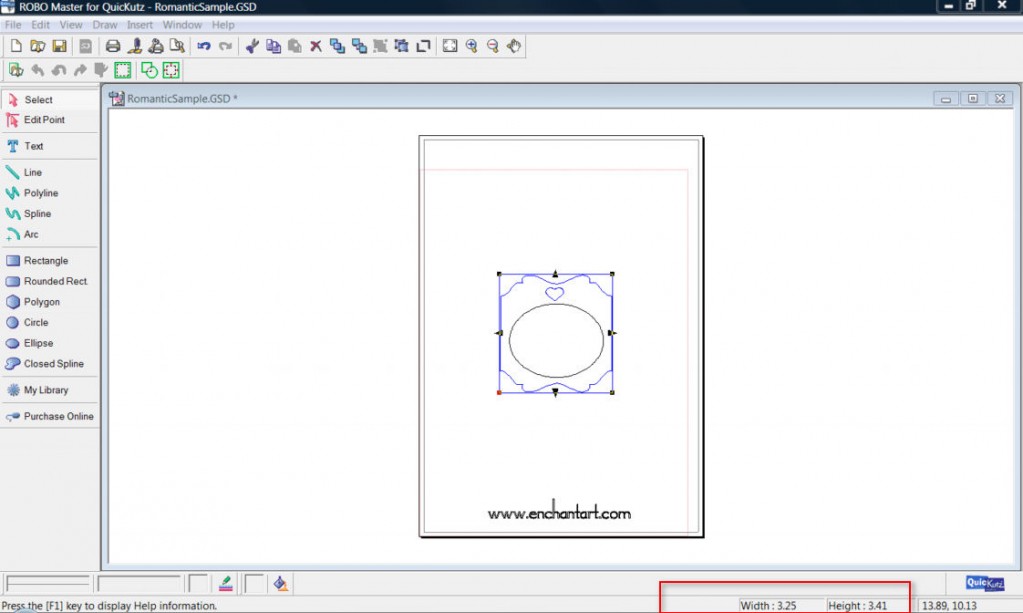
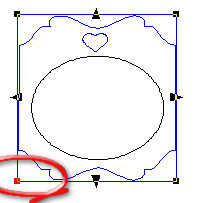
- Once it’s open, make a click on it in order to select the image. The image is going to have a blue box around it.
- Look at the bottom right corner of the screen and you can see the information about the Width and Height of the box that is around the image.
- Another way to know the size of your image is by righ-clicking on the image and choosing Position Settings…
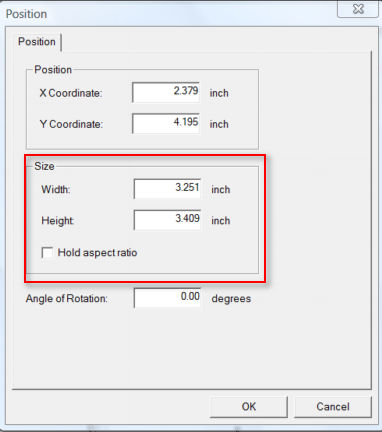
- Once you know the correct size of your image you can change it to the desired size, using one of these methods:
- With your selected image you’ll see a blue box around it. This box has four small squares at each corner and four triangles. You can click on one of any of these small squares, hold the click down and drag to resize the image keeping its proportions. If you want to resize the image altering the original proportions, use the triangles instead. When you click and drag either square or triange you can see the changes for the Width and/or Height in the bottom right corner of the screen.
- The other way to resize the image is to right click on it and choose Position Settings. Then, change the amounts for Widht and Height. If you want to keep the proportions, check the box for Hold Aspect Ratio and click OK.
You can use your beautiful stamps on almost any surface; just make sure that you use the right ink and inkpad.
I’m going to describe the different kinds of inks that are suitable for different surfaces. Below are the characteristics of the most common inks that you can find in craft stores:
DYE INKS:
-
Water-soluble
-
Vibrant colors
-
Fast-drying
-
Use with any kind of paper (matte or glossy)
-
Use Tsukineko Ink Potion #9 Blending Solution Spray on an inked stamp for a watercolor effect. Mix it with waterbased ink and spray on surface to achieve interesting backgrounds.
-
Popular brands:
-
Autumn Leaves
-
Ranger:
-
Adirondack archival, brights, lights, earthtones, color wash dye inks.
-
Archival #0 in different shades. These won’t bleed when using watercolors over the stamped image.
-
Big and Juicy: Rainbow and solid colors. Good when you use big stamps or a brayer to color a background.
-
Inkssentials Watermark Resist Ink: This creates the look of a watermark, or use it instead of bleach for a water resist on glossy papers. Good for embossing too.
-
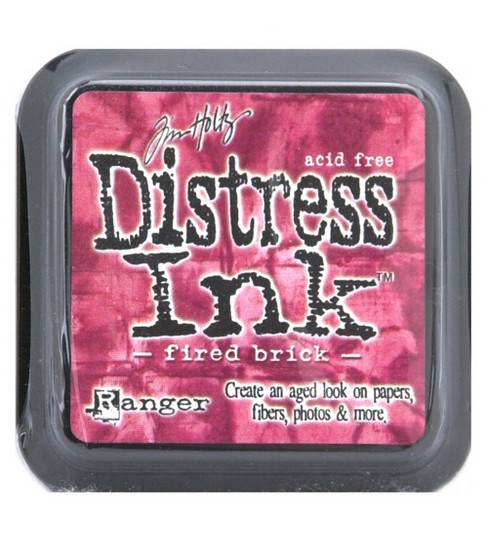
Distress Inkpads give a more vintage effect to the projects.
-
-
Plaid All Night Media Kids Inkpads
-
Rubber Stampede Dye Based Inkpad Sets
-
Hampton Art A La Mode Dye Inkpads
-
Vivid! Premium Dye Inkpad
-
 |
 |
PIGMENT INKS
- Opaque coverage
- Great for embossing
- Slow to dry
- If using on glossy papers or vellum, heat set to make it permanent
- Popular Brands:
- Adirondacks Pigment Inks: Light, Earthtones, Brights, Pitch Black and Snow Cap.
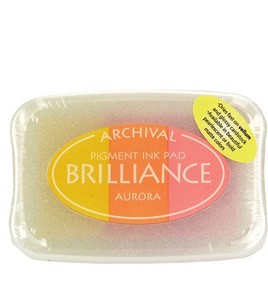
- Brilliance Pigment Ink Stamp Pads (dries faster than other pigment inks)
- Color Box
- Memories
- VersaColor
- VersaFine: Opaque and quick-drying
- Versamark Dazzle Watermark Ink
- Tsukineko Opalite Stamp Pads: Appear colorless on the pad, but stamp into iridescent colors. Great on dark cardstocks.
- Encore Ultimate Metallic Stamp Pads
- Studio G Washable Ink Stamp Pads
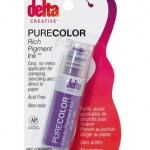
- Rubber Stampede Pure Color Pigment Ink comes in a bottle with tha applicator
- Leisure Arts Pastel Stamp Pad
- Plaid® All Night Media Metallic Pigment Inkpad – Gold or Silver
FLUID CHALK INKS
- Fast-drying or can be heat set
- Not for embossing
- Popular fluid chalk inks are:
- Cat’s Eye Queue Chalk Ink Pads
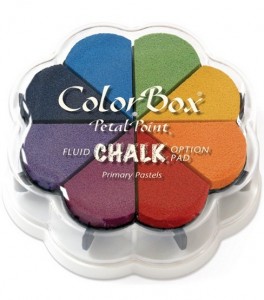
- Color Box Petal Point Ink Pads
- Quick Quotes Powder Puff Chalking Ink
SOLVENT INKS
-
Permanent
-
Fast-drying
-
Transparent
-
Good for glossy surfaces like glass, metal, shrink plastic, tiles, cellophane, glossy cardstock, aluminum foil, leather and acrylics
-
Great blending when applied to glossy surfaces
- Popular solvent inks:
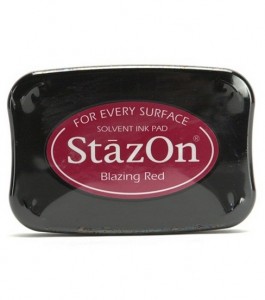
- Staz-On Ink Pads (clear and opaque). You may have to use Staz On Solvent Ink Stamp Cleaner to clean your stamps.
- Ranger Arindorack Alcohol inks (they come in small bottles). Don’t ink your stamp directly with this ink. Apply the ink with a foam applicator to the background. Also, there are fillable pens that can be used as markers. You can dilute these inks with Alcohol Ink Blending Solution from the same company.
There are other brands and other inks that you can find in specialized stores or only online. The most important thing is to remember the characteristics of each kind of ink and where you are going to apply it.
Tags: dye inks, fluid chalk inks, ink, ink brands, ink pad, ink types, inkpad brands, inkpad types, inkpads, pigment inks, solvent inks
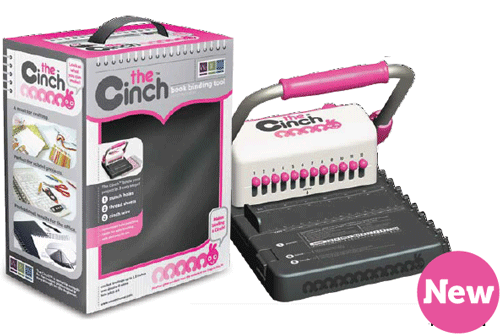
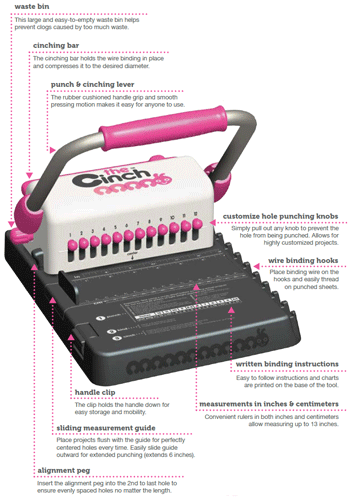
I’m a researcher who spends hours looking for information, and at the same time I try to invest my money in tools that justify their price. I like to buy tools that are efficient and durable (almost industrial). The Cinch is one of the best investments that I can think of. Using the Cinch, I can make my own scrapbooks, journals, books for the kids, etc. Plus, it is very sturdy and easy to use for anybody.
This machine can punch any quantity of round holes, anywhere, on any size of paper! I can use thin or thick materials. Also, I can use metal rings instead of buying the wires.
Too good to be true? You haven’t heard all: Enchant Art is going to sell it and you, my wonderful reader, have the opportunity to get it with a great discount. Are you ready? The Cinch for $85 (using the discount code). Also, I’m here for your support with any questions that you may have.
The discount code at checkout is: CINCH4U
Enjoy it!
If you have followed my instructions on How to Cut Directly from Inkscape Using the Silhouette, you now know that first, you can do it, and secondly, that it is hard to guess the cutting area in the document. In this tutorial, I’ll be showing you how to set up your cut area or red box inside your document.
- Open Inkscape.
- Open the file call default.svg located in C:\Program Files\Inkscape\share\templates.
- Go to File, Document Properties to make sure your Page size is A4.
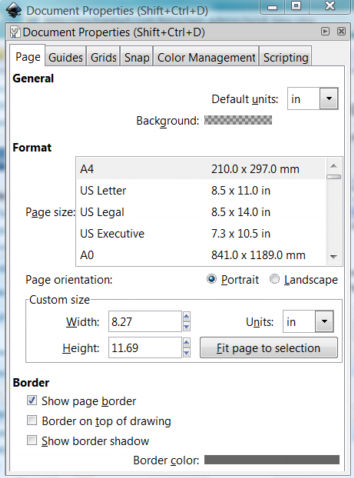
- On the Menu bar, click on Layer, Add Layer. Rename this layer: “Cut Area”. You will be working on this layer.
- Now, click on the Square icon and draw a square inside the page with Fill set to N/A and Stroke color red. Don’t worry about the dimensions now.
- On the Menu bar, click on Edit, Make a Bitmap Copy. Delete the first square that you made and keep the bitmap.
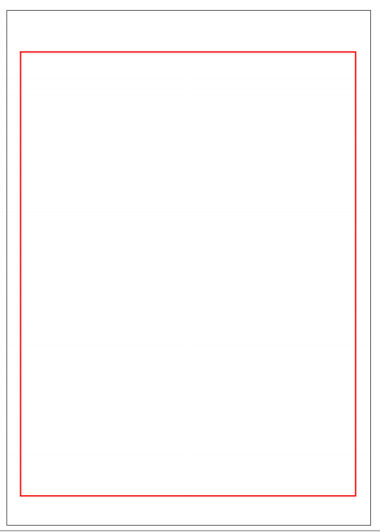
- Make sure the box is selected. We are going to make sure it is the right size and is positioned correctly so whatever we put inside the red box will cut using the Silhouette. Please follow these measurements: X: 0.300, Y: 0.646, W: 7.648 and H:10.110

- Your document should look like this:
- All done. Now save the file. Every time that you create a New Document, it is going to have these specifications. If you don’t want to see the red box, just hide it by clicking on the eye icon at the bottom left corner of your screen.
- When you are ready to cut, follow the instructions on How to Cut Directly from Inkscape Using the Silhouette.
You can create interesting backgrounds by using rubber cement before applying ink to the surface. For this technique, you need:
- Rubber Cement
- Card stock
- Brush
- Ink Pad (color of your preference)
Take the cardstock or any other surface where you want to apply the effect; using a brush, apply rubber cement over the cardstock, making a pattern or just random strokes. Let it dry.
Once dried, take a brayer with ink or an ink pad and drag it over the surface. Let the ink dry.
When the ink is dried, rub off the rubber cement from the surface. Now you can see the results and apply another stamp over it or other embellishments.
Photoshop allows you to create a path and then type text that would follow this path. I really like this feature since you can adjust the type and the path according to the project.
- Open Photoshop.
- Open a graphic or photo where you want to apply the text.
- Create a new layer.
- Click on the Pen tool.
- Move your mouse over the graphic and draw a path with the Pen tool.
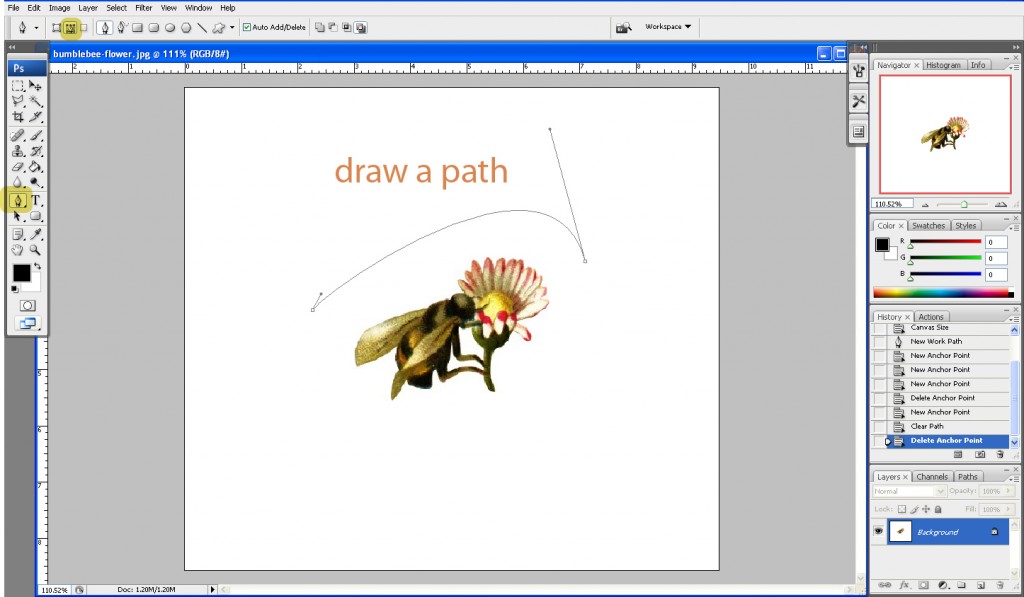
- Now click on the Type tool.
- Move the mouse over the path until the pointer changes with a wavy line crossing it. This is telling that you are over the path. Click and type your text.
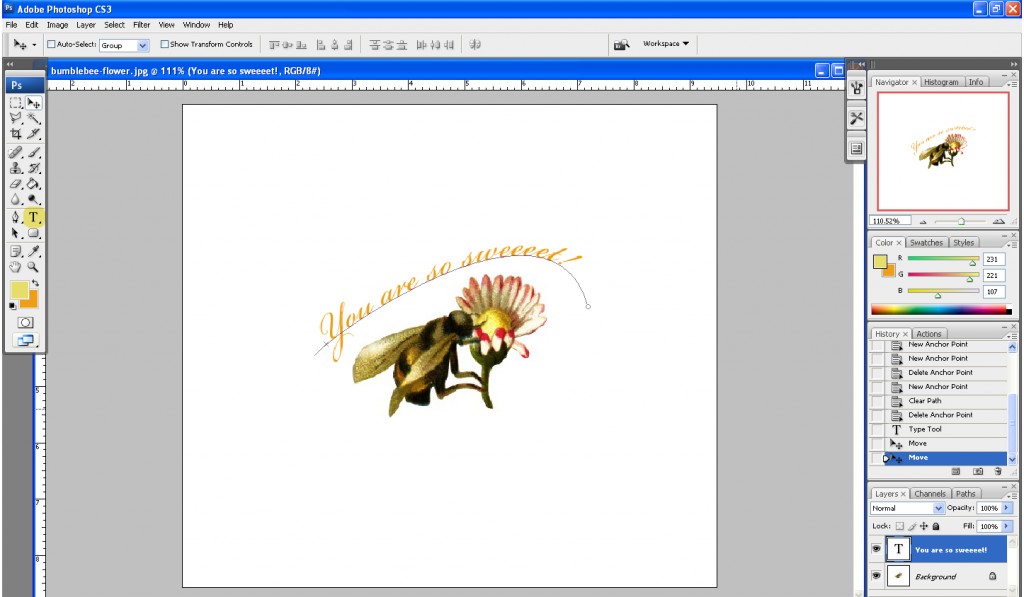
When you finish, click the Commit button or click on the Selection tool.
If needed, you can move the path with the text to the desired location. Also, changing to the Text tool again, you can select the text and change the font, font size, color, etc.
It’s a pretty easy technique but very useful for any project where you want to combine text and graphics.
Note: If you want to see the above images larger, just click on them and a new window will come out with the larger version of the image. Close that new window by clicking on the Close button at the bottom right corner of the window.
You can use prepasted wallpaper to add accents to your projects. Wallpaper comes in different and fun designs. For example, look at this very cute wallpaper of animals: 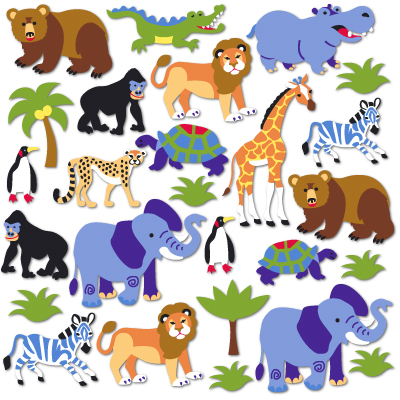
It is very easy to use prepasted wallpaper. Just cut the images that you want to use. Place the cutouts on your project to see how they look together.
Now, take each of the cutouts and using a damp sponge, moisten the back of the image and press it to the surface where you want to apply it.
Smooth the surface of the cutout with a bone folder or an old credit card.
This is a very easy way to add coordinated elements to any project.
