If you have followed my instructions on How to Cut Directly from Inkscape Using the Silhouette, you now know that first, you can do it, and secondly, that it is hard to guess the cutting area in the document. In this tutorial, I’ll be showing you how to set up your cut area or red box inside your document.
- Open Inkscape.
- Open the file call default.svg located in C:\Program Files\Inkscape\share\templates.
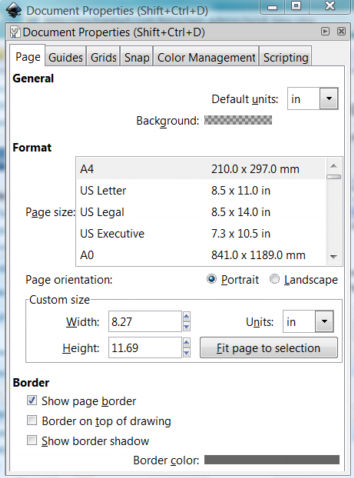
- Go to File, Document Properties to make sure your Page size is A4.

- On the Menu bar, click on Layer, Add Layer. Rename this layer: “Cut Area”. You will be working on this layer.
- Now, click on the Square icon and draw a square inside the page with Fill set to N/A and Stroke color red. Don’t worry about the dimensions now.
- On the Menu bar, click on Edit, Make a Bitmap Copy. Delete the first square that you made and keep the bitmap.
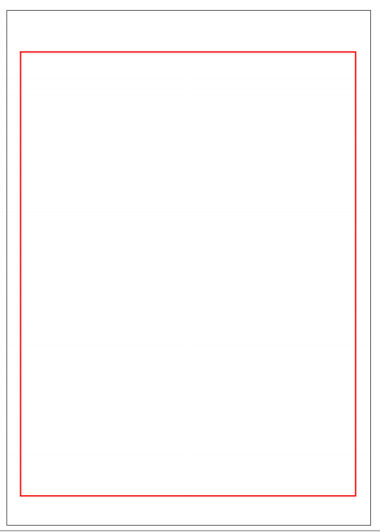
- Make sure the box is selected. We are going to make sure it is the right size and is positioned correctly so whatever we put inside the red box will cut using the Silhouette. Please follow these measurements: X: 0.300, Y: 0.646, W: 7.648 and H:10.110

- Your document should look like this:

- All done. Now save the file. Every time that you create a New Document, it is going to have these specifications. If you don’t want to see the red box, just hide it by clicking on the eye icon at the bottom left corner of your screen.
- When you are ready to cut, follow the instructions on How to Cut Directly from Inkscape Using the Silhouette.


I have no clue what I am doing wrong. I follow the steps and then when I get to make a bit map copy and delete the first square. I dont know how to select the square and delete. I guess this is way over my head, lol!!! Can you please help me and tell me what I am doing wrong?
Thanks so much,
Tanya
I don’t think you are doing anything wrong Tanya, just make sure to follow step 6, once you created a square and made the bitmap, change the View. Go to View, Display Mode and select Outline.
You are going to see a box with a red X inside.
Using the Move tool, click inside the box and move it aside. Now, you’ll see two boxes, press the Delete key to get rid of the one that doesn’t have the X inside.
The one with the X is the Bitmap image and we want to keep that one.
Now click on the box to select it and continue with step 7.
I really hope this is helpful.
Take care.
Glenda
I don’t know what is wrong, but the red box after I put the red box ends up being a tiny little blip down on the left side of the black outline
After you create your box, follow step 7 to resize the box. Good luck!
[…] up with my post “Set Up the Cut Area in Inkscape”, I was playing again, trying to have as much cutting space as I could. So, I came out with these […]