You can get wonderful effects using a pattern as a background for an image. This is very simple:
- Open Photoshop. Open an image, like the vintage label that I’m using.
- Create a New document – File, New (a Letter size is fine, later you can trim the canvas). Click OK.
- Make a rectangle, using the Rectangle Tool.
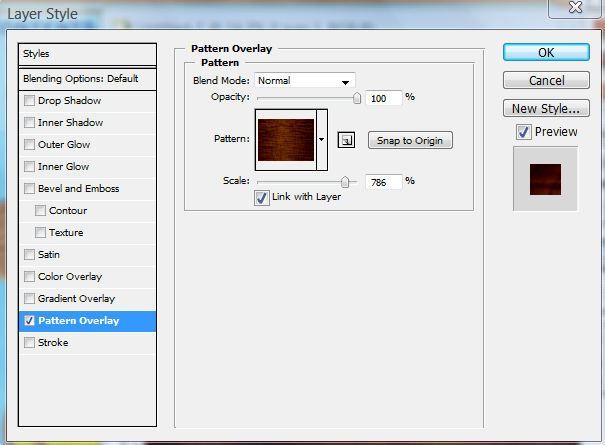
- Go to the Layers palette and click on the icon with the little f located at the bottom left of the palette. From the pop up menu, choose Pattern Overlay… or click on the Layer menu, Layer Style, Pattern Overlay…
- The Layer Style window will appear. Choose a Pattern from the ones available (you can download patterns from the Internet also). Your rectangle should be filled with the pattern that you chose. You can move the Scale slider and zoom in or out the pattern. When you are happy with the background, click OK.
- Using the Move Tool, from the toolbox, click on the window that contains your image, then click on the image, keep pressing the mouse button and drag it to the window with the background.
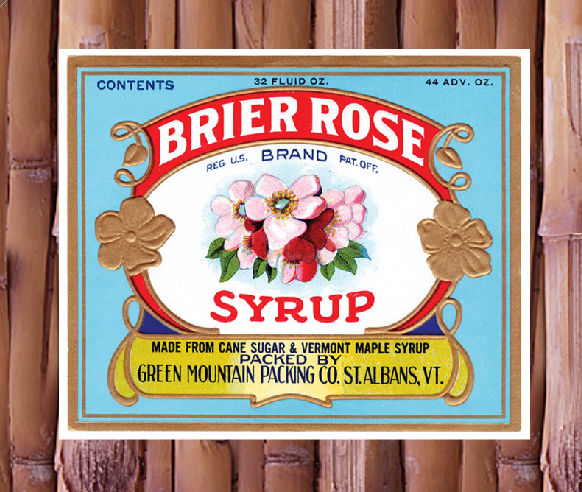
- On the Layers palette, click on the layer that contains your image. On the same palette, change the Mode from Normal to Overlay. If you don’t like the background, you can always change it by clicking on the Pattern Overlay layer effect.
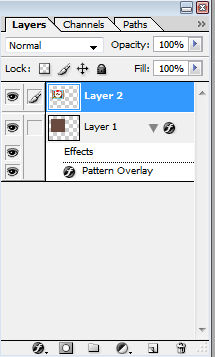
- Click on the icon next to the small f; that is the Add a Vector Mask icon. Click on the Brush tool from the toolbox and choose a small brush and the color black.
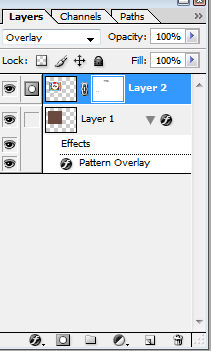
9. Now, paint over the image in order to “erase” or hide small, irregular parts from the edges. This is going to make your image more naturally embeded with the background. 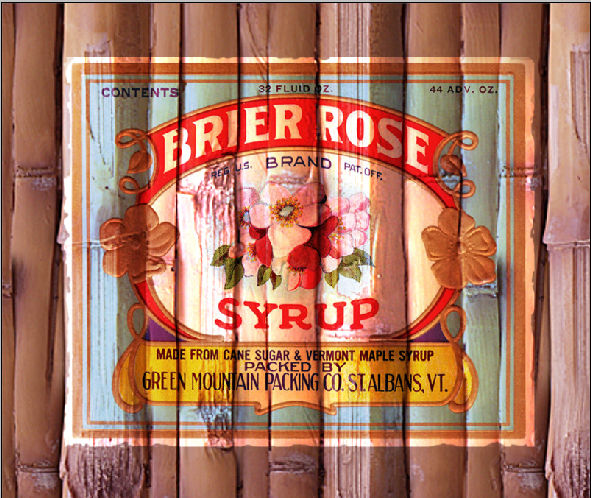
If you just took a picture and want to make it look old and vintage, Photoshop has a great and fast way to reproduce the effect:
- Open your document and make a duplicate of the layer (Ctrl+J).
- Click on the Styles palette to put it in front of the other palettes from the group. If you don’t see it, open it by going to Window, Styles.
- Click on the top right corner of the palette and choose Photographic Effects.
- Click on the Sepia tone, that is the second icon in the Styles palette.
- If you notice in your Layers palette, the copy of the image shows that Effects have been applied to it. Click on Color Overlay shown under the Effects, to open the Layer Style window. Click on the color swatch to change the color applied to the picture. Also, you can change the Blend Mode and Opacity of the effect from here.
This is a very straightforward way to produce a vintage look in a photograph.
Tags: how to make a picture look old, photoshop, vintage picture
When we take pictures, sometimes colors don’t match. There are different ways of changing colors in your image. This one is using the Replace Color command:
- Open Photoshop and open your image.
- Using any of the Selection tools, make a rough selection of the area where you want to change the color. Nothing precise.
- Click on Image, Adjustments, Replace Color.
- The Replace Color dialog box is going to appear. You are going to see that it is divided in two sections: Selection and Replacement.
- In the Selection area: Make sure the Selection radio button is selected since we want to get the color from the selected part of the image. Click on the Eyedropper that has a little + next to it and click on the area that you want to include in your selection. If you want to eliminate some areas, choose the Eyedropper with the – next to it. Also, you are going to see a slider that controls the Fuzziness: increase or decrease the tolerance of color with it.
- In the Replacement area: Move the sliders for the Hue, Saturation, Lightness until your reach the desired color. Turn on and off the Preview check box to see the changes. Click OK.
The original color has been changed to the new one and you can be proud of your skills.
Dingbats are fonts that have symbols instead the regular alphabet. Wingdings and Webdings are examples of dingbats that come with your regular word processor. Also, you can download hundreds of free dingbats from the Internet.
If you have ROBO Master software, follow these instructions (the same apply to any other True Type font) to use dingbats:
- Open ROBO Master.
- Create a New Document.
- Choose the T for text.
- From the Text Settings window, choose your dingbat. If you don’t remember the name of the font or if you want to see how the font looks, just click on the box next to Font. Then, using the arrow keys from keyboard, move down. Keep pressing the down arrow key until you find the font that you like.
Change the Font Size or Height of your font. If you want a mirror image of your font, check the box that says X Mirror. The Outline option should be always checked if you want to cut. Click OK. - Now you are back to the main screen. Click on the page to make your image available for formatting.
- If you want to resize your image, position your mouse over the red square, click, hold down the mouse button and drag it to the desired size. Also, you can right-click on your image and from the menu select Position Settings… In the Position window, change the Size of your image. If you want to keep the proportions of the original image, click on the Hold aspect ratio box to check it. OK.
- You are back to the main screen again. Move the image by clicking on top of it and dragging it to the desired position.
- Your image is ready to cut like you do with any other image.
Note: You don’t have to install your fonts (dingbats or not) to your computer in order to use them with ROBO Master; just look for your font in the Fonts folder and double-click to open it. Minimize that window. If you have ROBO Master open, you’ll see the name of the font listed among the fonts installed in your computer. You can use it to cut as long as you keep the font open in the other window. Make a note in the document about the name of the font that you used for future reference.
It has been a long wait for this machine….maybe I’m just anxious to see if it is what I want of a digital cutting machine. Will it be what I expect and daydream of an ideal digital cutter? Will I love it more than my Silhouette? … I don’t know…I have to wait until late January, when the new sensation comes out. I’m excited about it, I have to confess. My expectations are very high because Craftwell is putting their heart into this machine. They want to bring the best and that is hard with limited time.
According to their December newsletter, the first SD Image Card is going to include 150 images with upper and lower case fonts, numbers, and symbols, images, etc. Cool! the best part is that this SD card is going to be included with the machine at no cost. Really great way to start.
The release day for the eCraft has been postponed until the January CHA (Craft and Hobby Association) winter convention. Many people are dissapointed but I think it’s worth waiting for. The clock is ticking and I can’t wait to put my hands on this machine. I’ll let you know how it cuts, what it cuts, if it’s cost-effective and my recommendations.
If you want to change Inkscape’s default page, that is the first page when you open Inkscape, follow these steps:
- Go to your Program Files. Usually they are on the C: drive (Computer, Local Disk, Program Files)
- Double-click on the folder for Inkscape.
- Double-click on the Share folder.
- Now, double-click on the Templates folder.
- There are going to be many templates in that folder. Look for the one that says default.svg. Double-click on it to open.
- Once you have this template opened in Inkscape, you can see that your page is size A4 and the units displayed are pixels. To make any changes, go to File, Document Properties. The Document Properties window appears.
- Under the Page tab, General, change the units to inches. In Format, Custom Size, change the units to inches and type the Width and the Height of your preference.
- There are other tabs available if you want to explore. The other tab that I find useful is the Snap tab, if you want to change the behaviour of it.
- When you finish with all the changes, just click on the X to close that window. Now, you have a new Default page and you have to save it if you want to keep these changes next time you open Inkscape. Click on File, Save and close the program.
- Open Inkscape again. You should be able to see all the changes and work on this page.
Inkscape is a great program. Play with it and enjoy the many features that it offers.
Inkscape is an Open Source vector graphics editor, meaning that it is free for everybody. It’s a vector software with capabilities similar to Illustrator or CorelDraw, different than pixel-based software like Photoshop. With Inkscape, you can design and cut if you have a digital cutter machine, because these machines can “read” the nodes that make lines or other shapes. Inkscape saves in many formats but the default format is the SVG file format.
With Inkscape, it is very easy to edit shapes and nodes, trace bitmaps (pixel-based graphics) and convert them to a vector shape.
The new version includes many new features. If you want to download it, click on the following link:
http://www.inkscape.org
Tags: Inkscape 0.47
If you want to make your own fabric book cloth, here are the materials:
- 1/2 yard of any fabric
- HeatnBond Iron-On Adhesive (fabric adhesive product that you can find at any fabric store)
- Base paper, the same size as the fabric
- An iron
Here are the directions:
- Iron the HeatnBond adhesive to the wrong side or your fabric.
- Remove the paper backing from the adhesive and place your base paper on top.
- Place your iron on top of the base paper to activate the adhesive.
- Cut the fabric backed with paper into the desired size.
Very easy! Imagine the possibilities….You can use this paper backed fabric to make the covers of your books and use different designs of fabric according to the theme of your book. To reinforce the fabric, you can stitch all around with zig-zag and beautiful color threads.
You can use so many different materials when producing your own books. I want to mention the basic materials and tools that you need:
Paper: You can use from the thin Japanese papers (expensive) to the thickest cardboard. I recommend to buy quality papers. Please refer to my table of paper weight as a guide (http://enchantart.com/blog/?p=727). Remember to identify the grain of your paper. Usually, the grain runs the length of the paper. Your folds should be parallel to the grain (important if you are using thick cardstock), otherwise your paper will crack. In many papers, the grain is going to be labeled by the company that makes them. Handmade papers don’t have specific grain, most of the time.
Cover Board: If you want to make hard cover books. The most common is Davy boards. Cover boards come in different thickness from 0.02 to 0.147. The most used is the 0.08-thick board.
Cloth: Binder’s cloth is a very strong cloth backed with paper. Also, you can make your own by backing your cloth with thin paper, like rice paper.
Adhesive: PVA (polyvinyl acetate) or you can make your own cornstarch paste. A glue stick can be used as well. Also, I like to use tape runners.
Thread: You can use waxed linen thread but it’s more expensive that other resources like cotton thread, embroidery silk, ribbons, yarn, etc. The only requirenment is that your thread should be strong enough to handle the opening and closing of the book. You can buy beeswax to apply to your thread.
Cutting Tools: Personal paper cutter. Ruler. Craft knife. Scissors.
Measuring Tools: Square angle ruler. 24″ metal edge ruler.
Other: Craft needles with the eye big enough for your thread. Awl or drill. Bone folder. Clamps
These are the materials that are going to make your bookmaking easier and more enjoyable. You are not going to need all of them at the same time but if you want to make more than just folded books, I recommend to get these materials.
I know there are so many journals in the stores. They are beautiful and some of them are very artistic. But nothing can be like the ones that you can create. They may be not as perfect but they will reflect your personality, your choice of colors and textures. There is nothing like creating your own collection of handmade books that you can use for journaling, photos, memorabilia, etc. I’ll be giving you instructions how to make them and how to have fun in the process.
Tags: handmade books


