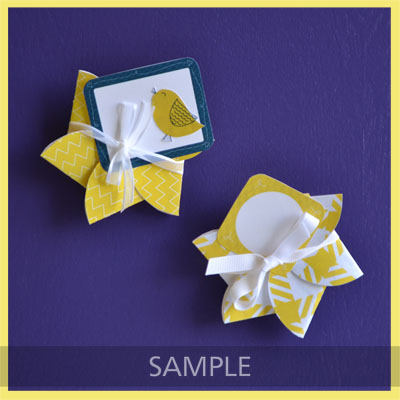
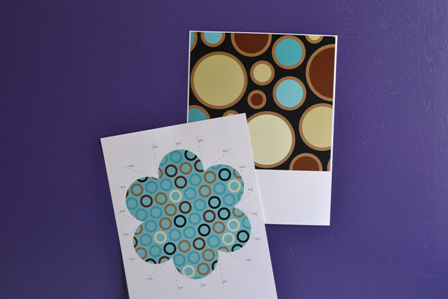
Today, we are bringing you a very cute project: a flower card accompanied by the free template and different papers. Download and use these papers and embellishments for making your own flower cards. These papers are from the My Memories scrapbooking software. If you are interested in getting the software, use the coupon code STMMMS36086 at My Memories upon checkout, you’ll receive a $10 discount off the purchase of the My Memories Suite Scrapbook software and a $10 coupon for the MyMemories.com store – a $20 value!
Let’s take a look at the project using the three different free downloadable kits:
How to Assemble your Flower Card
1. Print your file on cardstock.
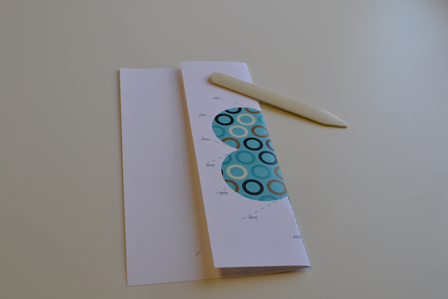
2. Take your card template page and fold at all fold lines. A bone folder helps make the creases nice and crisp to help your finished card to look nicer.
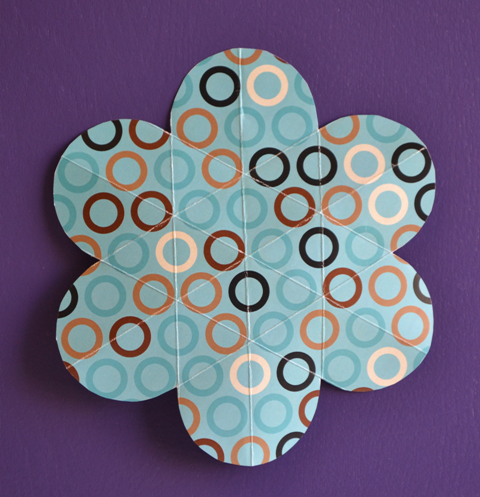
3. There should be a total of 9 folds when you are done.
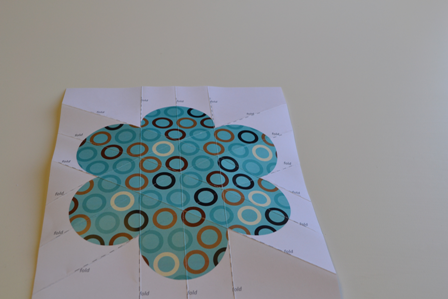
5. Turn your card over so that the printed side is down and pinch the sides of each petal together until all 6 petals are standing straight up.
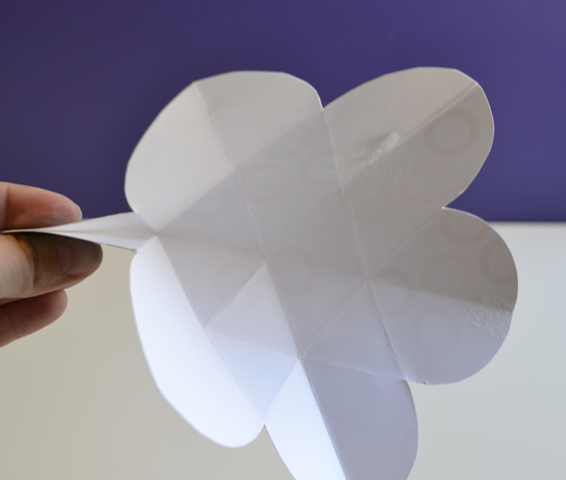
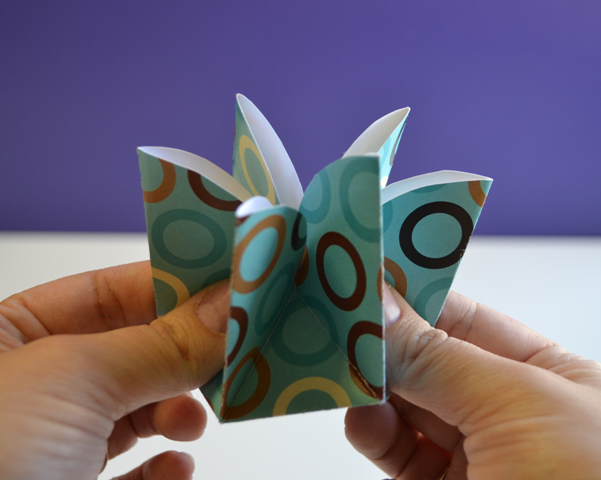
6. Gently push all the petals in one direction until they lay flat.
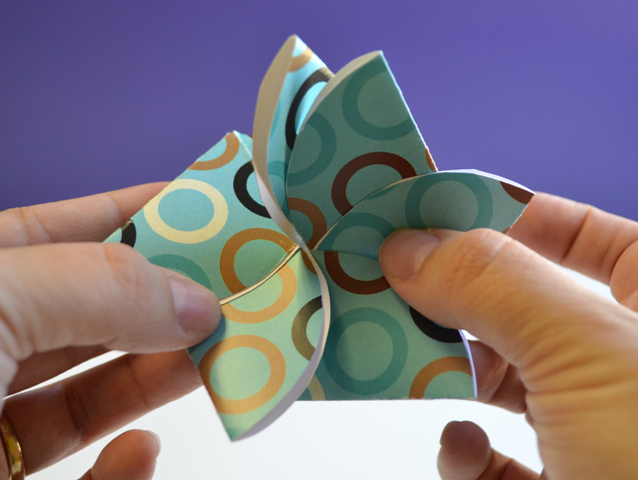
7. You now have a flower card.
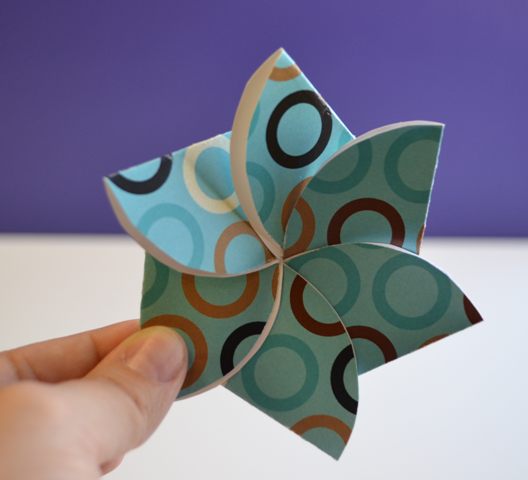
8. Tie a ribbon (not included) or something equivalent around the card to hold it closed.
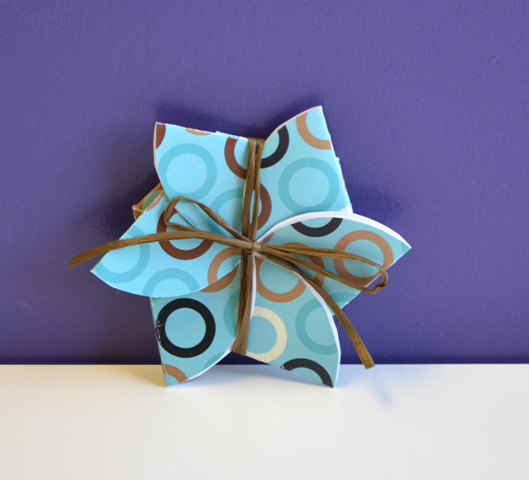
9. Embellish as desired. This card was embellished with a circle cut out from a piece of background paper.
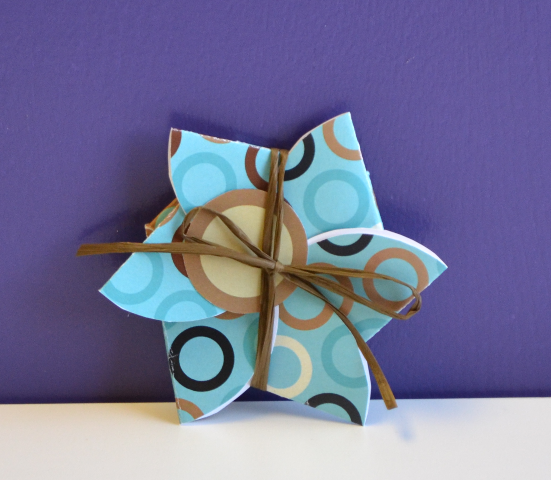
To download Kit 1, click here.
To download Kit 2, click here.
To download Kit 3, click here.
Glenda
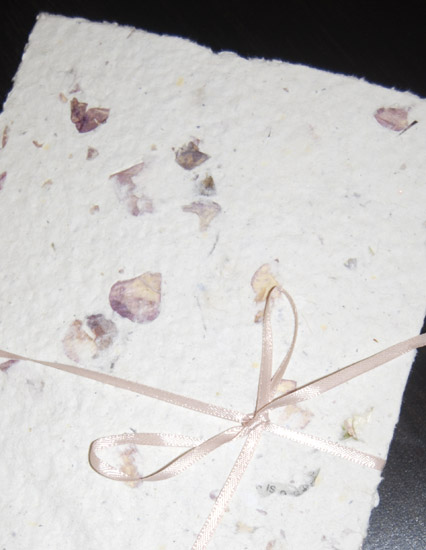
A really nice gift for a wonderful mother! This one of a kind book has the beauty of the handmade paper, the special sentiment of the original and unique poem from artist Glenda Castillo. All together evoque love, care and the most precious feelings. The frames and graphics are also very inspirational and moving. The book is signed by the artist.
The granite looking papers are the background for the following poem:
I Know You Are My Mom Because…
…you took care
of my scraped knee
when I fell from the bike;
…you were my first teacher of devotion
and sacrifice;
…you prayed for me
even when you didn’t know I needed a prayer;
…you gave me the best advice … always;
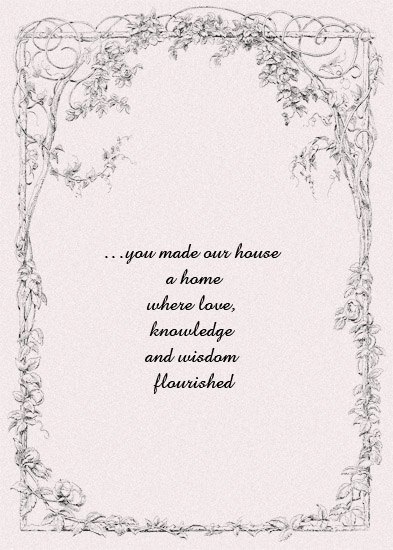
…you made our house
a home
where knowledge and wisdom
flourished;
…you encouraged me
to start all over again;
…your eyes were bright
and your heart filled with love
when you talked
about me;
…you showed me the beauty
of the rose
and the spines;
…you missed me
when I said goodbye;
…your heart and soul
couldn’t wait
for me to come back.
That’s why…
…your name is almost
sacred for me;
…you are so close
to my heart
and you’ll always be;
…when others tell me
I have some of your attributes,
I’m proud of it;
…I will remember you …
always…
…I will love you …
eternally…
If you want more information about this book, just click here.
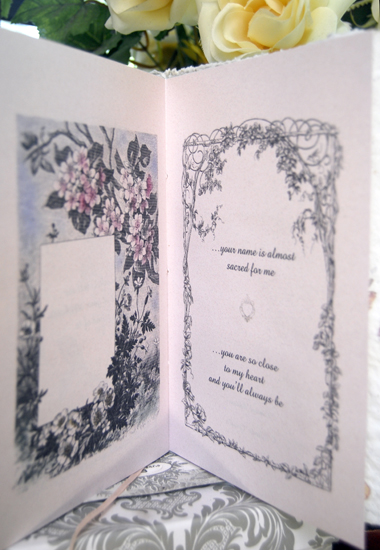
These are more pictures how it looks inside:
What a beautiful and meaningful gift!
Glenda
Tags: handmade gift for mother, mother poem, mother's day gift
Enchant Art have wonderful customers from many places in the world. Some of them had asked me how to cut a graphic using their Silhouette. So, I wrote this tutorial in English and in Spanish to make everybody happy.
Enchant Art tiene clientes de muchos lugares del mundo. Algunos de ellos me han preguntado como cortar sus graficos usando su maquina Silhouette. Entonce, he escrito este tutorial en Español tambien para que todos esten contentos.
SILHOUETTE PRINT AND CUT TUTORIAL
If you have a Silhouette and would like to learn how to use those beautiful graphics that you find on the Internet or that you have on your computer, here is the tutorial for today. I used two different graphics in this tutorial just to show you that you can use any graphic to print and cut:
1. First, open the Silhouette Studio program.
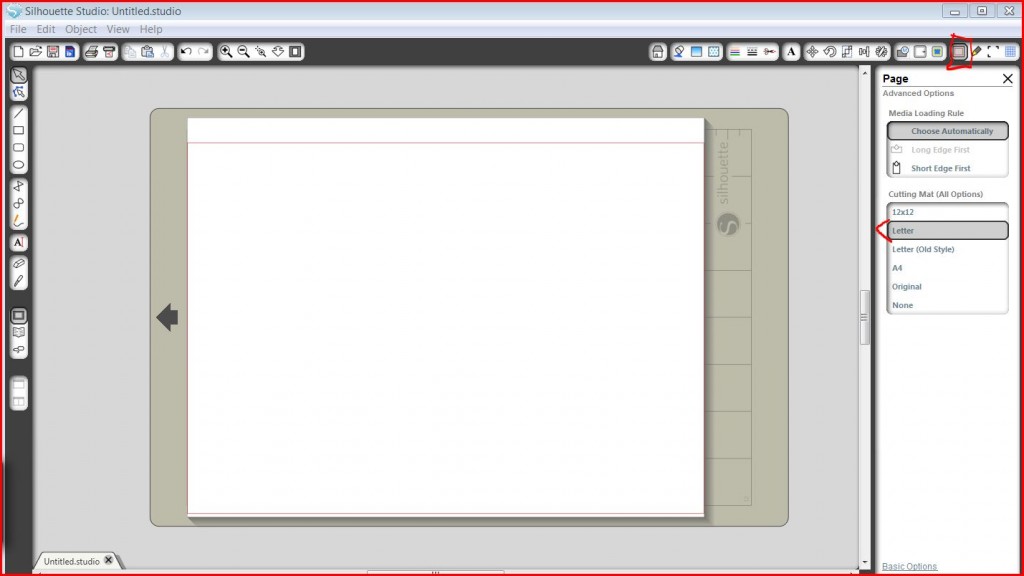
2. Make sure your page on the screen is Letter size, since you will be using your printer to do the printing part. See this graphic as a guide:
3. Click on File, Open to look for a graphic saved on your computer. Click on the Files of Type box and choose the correct extension for the graphic that you intend to print. This graphic needs to be a .jpeg. ,png, .bmp. or .tiff file type.
4. Once the graphic is on the screen, resize it and position it wherever you want it to print on the page.
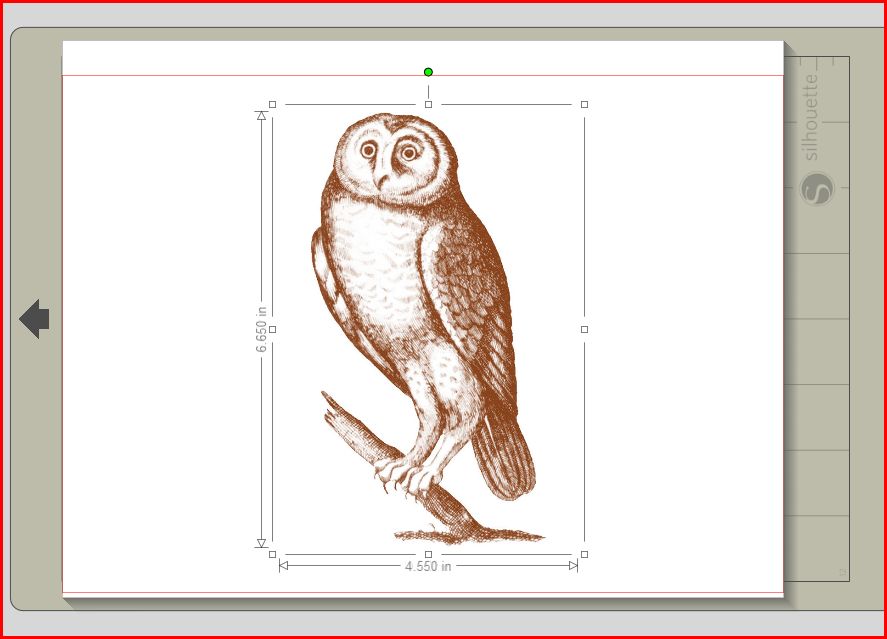
5. This graphic is not ready yet to be cut. You need to trace it using the Tracing tool in the software. In order to do this, click on the Trace icon. Then click the “Select Trace Area” button. Select your graphic by clicking in one corner outside the graphic; keeping the mouse button pressed, cover the whole graphic with the box.
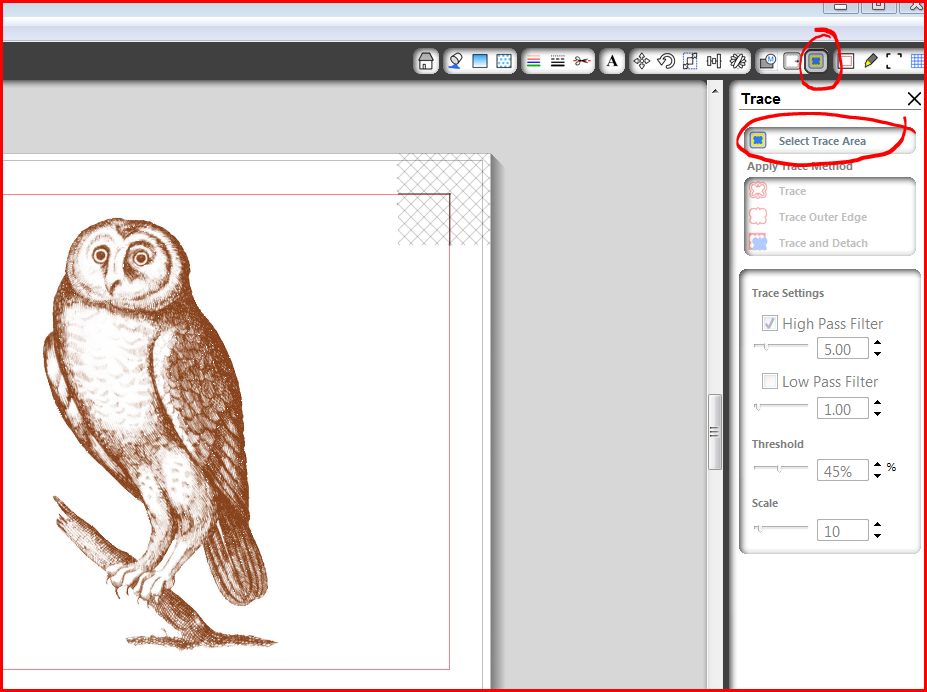
6. In the Trace Settings, make sure the High and the Low Pass Filter boxes are unchecked.
7. Move the Threshold slider to the right, until you see the inside of the graphic covered by yellow. It doesn’t have to cover the whole graphic but as much as you can.
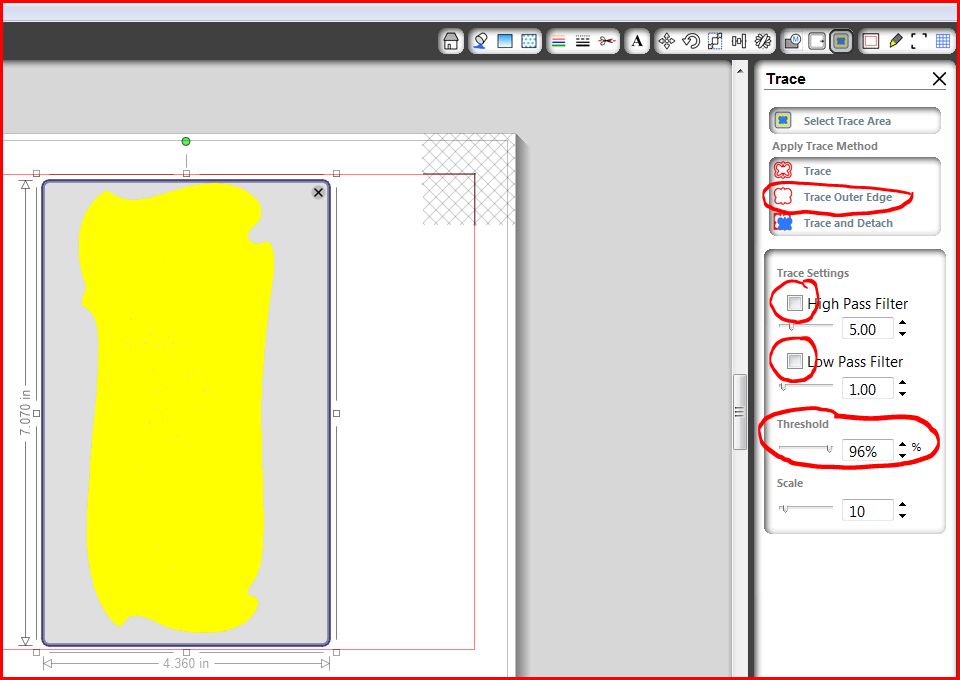
8. Then, click on Trace Outer Edge. Now, you are going to see the graphic with a red line around it. This is the cutting line.
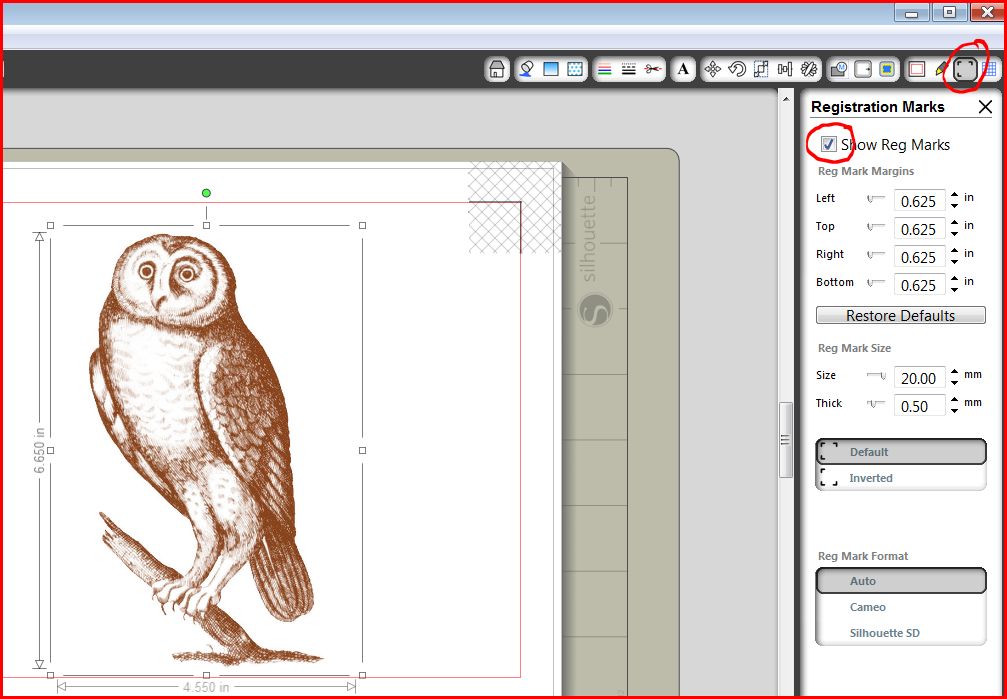
9. Next, we are going to add registration marks to the page. The Silhouette uses an optical eye to “see” the registration marks added to the page by the software. In order to add these registration marks, click on the icon at the upper right of your screen that has 3 lines and click to check the Show Reg Marks option.
10. Click on File, Print and print your paper using your printer. I like to print using the best quality option and making sure I choose the right kind of paper (photo paper, cardstock, etc.)
11. Once the graphic is printed, you’ll see the paper also printed the registration marks. Place the printed paper on the Silhouette mat and feed it to your machine as you do with a blank paper.
12. Choose the icon with a blade to start the cutting part. Choose also the right settings for paper or cardstock and the speed of cutting (I always cut in low speed, 2 or 3) and click on Send to Silhouette:
13. The Silhouette is going to scan the page and look for the registration marks in it. Once it finds them, it will cut around your graphic.
Ready! If you have any question, please ask in this blog or email me at glenda@enchantart.com. If you are interested to buy a Silhouette Cameo, please consider our store www.enchantart.com.
Este es el tutorial en español:
TUTOTIAL DE COMO IMPRIMIR Y CORTAR USANDO EL SILHOUETTE
Si ya tiene un Silhouette Cameo, ha realizado cortes normales, pero ahora quisiera conocer más de la función de imprimir y cortar con su máquina, este es el tutorial que le enseñara como hacerlo. Usted aprenderá a cómo utilizar esos gráficos hermosos que encuentra en el Internet o que tiene en tu ordenador. Voy a utilizar dos diferentes graficos para darles una mejor idea de todo lo que puede utilizar con su maquina. Aquí está el tutorial de hoy:
- En primer lugar, abra el programa Silhouette Studio, que vino con su máquina.
- Asegúrese de que su página en la pantalla es tamaño carta, ya que va a utilizar su impresora para hacer la parte de impresión. Ver este gráfico como guía:
- Haga clic en File, Open, esto es “Archivo, Abrir” – para buscar un gráfico que haya grabado en su ordenador. Haga clic en el cuadro que se refiere al tipo de archivo, Files of Typey seleccione la extensión correcta para el gráfico que desea imprimir. Este gráfico debe ser un .jpeg. , png, BMP. o tipo de archivo .tiff.
- Una vez que tenga el grafico en la pantalla, póngalo del tamaño deseado y en el lugar que usted lo desee imprimir en la página.

- Este gráfico no está listo aún para ser cortado. Necesita delinearlo haciendo uso de la herramienta Tracing del programa. Para hacer esto, haga un click en el icono de Trace. Haga clic en el botón Select Trace Area “Seleccionar área de seguimiento”. Seleccione el gráfico haciendo clic en una esquina fuera del gráfico manteniendo presionado el botón del ratón hasta sombrear todo el grafico.

- En la configuración de seguimiento, Trace Settings, asegúrese de que las casillas de filtro de High y de Low Pass esten desactivadas. Esto es que no hayan vistos en ninguna de ellas.
- Mueva el Threshold a la derecha, hasta que vea el interior del gráfico cubierto por un color amarillo. No tiene que cubrir el total del gráfico pero tanto como se pueda.

- A continuación, haga clic en Trace Outer Edge. Ahora, va a ver el gráfico con una línea roja alrededor del mismo. Esa línea es la línea de corte.
- A continuación, vamos a agregar marcas de registro (registration marks) a la página. Su Silhouette utiliza un ojo óptico para “ver” las marcas de registro que agrega a la página por medio del software. Para agregar estas marcas de registro, haga clic en el icono situado en la parte superior derecha de la pantalla que tiene 3 líneas; haga clic para activar la opción Show Reg Marks“Mostrar marcas de Registro”.

- Haga clic en File, Print, e imprima el grafico en el papel utilizando su impresora regular. Personalmente, me gusta imprimir usando la mejor opción de calidad; asi también asegúrese de elegir el tipo correcto de papel (papel fotográfico, cartulina, etc.).
- Una vez que se imprime el gráfico, verá que el papel impreso también contiene las marcas de registro (tres marcas). Ahora, coloque el papel impreso en el mat del Silhouette y aliméntela al equipo como lo haría con un papel en blanco.
- Seleccione el icono con una cuchilla para iniciar la parte de Corte. También elija la configuración correcta de papel o cartulina y la velocidad de corte (siempre cortada en baja velocidad, 2 o 3) y haga clic para enviar a Silhouette, Send to Silhouette:
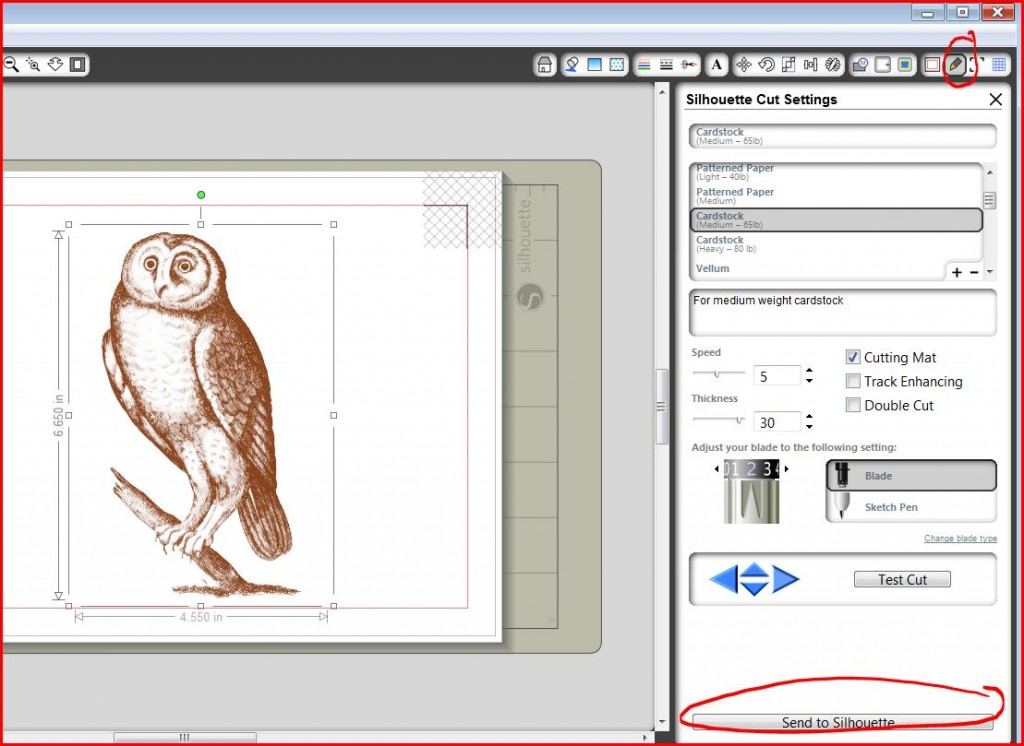
- El Silhouette va a analizar la página y buscar las marcas de registro en ella. Una vez que las detecte, cortará alrededor del gráfico.
- Listo! Si tiene alguna pregunta o comentario, escribame en este blog o envieme un email a glenda@enchantart.com. Si desea adquirir una maquina Silhouette Cameo, considere nuestra tienda www.enchantart.com
Tags: print and cut with silhouette cameo, tutorial de como imprimir y cortar con el silhouette cameo, tutorial silhouette
I’ve been using Inkscape for a long time and this is the first time that this error appears when I tried to open the program. If this happens to you, the solution is very easy. Just follow your own path to find the preferences.xml file and delete it. For example with mine, I have to go to Computer, Users, Glenda, Application Data, Inkscape and inside the Inkscape folder, I found the preferences.xml file. I simply deleted it.
Then, I opened Inkscape as always and when it opens, Inkscape will create the preferences.xml file automatically. You don’t have to do anything else.
At the same time, I also had a problem with my WACOM table since the program wasn’t recognizing it. To solve this problem, I click on File, Input Devices and in the Configuration tab, change the options from Disabled to Screen.
That’s it for now. I hope this had helped you to solve these problems that can be time consuming and prevent you to do more fun things, like developing your creativity.
Glenda
Tags: Inkscape error, wacom table, xml
I found a poem, very inspiring to me. Dreams are sometimes everything we have, sometimes they are just part of us and sometimes we forget they exist. If you’d like, read this beautiful poem written by Virna Sheard (1913):
DREAMS
Virna Sheard
Keep thou thy dreams–though joy should pass thee by;
Hold to the rainbow beauty of thy thought;
It is for dreams that men will oft-times die,–
And count the passing pain of death as nought.
Keep though thy dreams, though faith should faint and fail,
And time should loose thy fingers from the creeds,
The vision of the Christ will still avail
To lead thee on to truth and tender deeds.
Keep thou thy dreams all the winter’s cold,
When weeds are withered, and the garden grey,
Dream thou of roses with their hearts of gold,–
Beckon to summers that are on their way.
Keep thou thy dreams–the tissue of all wings
Is woven first of them; from dreams are made
The precious and imperishable things,
Whose loveliness lives on, and does not fade.
Keep thou thy dreams, intangible and dear
As the blue ether of the utmost sky,–
A dream may lift thy spirit past all fear,
And with the great, may set thy feet on high!
I hope this poem allows you to dream and to share your dreams with others.
Glenda
We continue with the Altered Book 101 Series. This time, I would like to explain more about how to change the background of a page using different techniques.
Some of the same faux painting techniques for the walls, can be applied to the papers.
SPONGING
- Sponge: Natural or man-made
- Acrylic paint thinned down with water or acrylic extender
- Disposable plate
Pour some thinned paint on a disposable plate. Damp the sponge with water and squeeze out excess. Lightly, press sponge on the paint and dab the excess on a paper towel.
Pounce the sponge on the paper several times and changing the position of your hand in order to create random designs.
Add another color if desired. For a faster application add two colors to the sponge at the same time just make sure not to mix the colors too much.
SCRUBBING OFF
- Acrylic paint(s)
- Bristle Brush
- Baby wipes
Apply the acrylic paint to the paper using a dry brush. Immediately, rub the surface with a baby wipe to remove some of the paint on the paper. Use more baby wipes and use a dabbing motion to remove more paint in certain areas of the paper.
Add more paint of the same color or other colors to achieve more depth or texture.
SCRUBBING ON
- Acrylic paint(s)
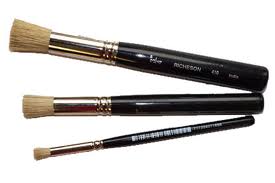
- Stencil Brush
Apply thinned acrylic paint to paper using a stencil brush. This method allows you to create more soft layers of paint by scrubbing the paint on the paper using circular motion.
TEXTURE WITH PLASTIC WRAP
- Paints diluted with water
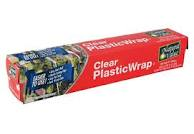
- Plastic wrap
Paint the paper with the acrylic paint, use more than one color if you wish.
Place the plastic wrap on the paper and using your hands, crumple the plastic wrap to the desired pattern.
Let it dry and remove the wrap from the paper.
OLD WORLD FLAVOR
- Thick paper
- Acrylic colors
- Old credit card or knife
Create the looks of old walls using paint and scraping it on the papers’ surface using an old credit card.
Using thickener paint medium you can make the paint look more raised and add more texture to the paper.
If you want to add more than one color, wait until the paint is dry and apply the other color to the paper. Another option is to work with wet paints to achieve a softer transition blending the areas where the different colors of paint blend together.
SPATTERING
- Paper
- Paint (acrylic or watercolor) thinned down with water or acrylic extender
- Brush (tooth brush or old stiff art brush)
Cover the surface where you are going to work with scrap paper or newspaper to protect your work surface. Thin paint with water accordingly to the effect that you want to give to the paper.
Dip the very tip of the brush into the paint and using your finger or an old credit card, pull the bristles towards you and targeting the paper. Once the paint is dried you can apply another color over the first one.
VARIATION:
- Before spattering lay a stencil or any object over the paper to create a mask. The area covered with the stencil will remain in the original color contrasting the spattered area.
- Use an atomizer to spray fine dots of paint on paper or adjust the nozzle to apply more paint at a time.
FAUX LEATHER
- Paper
- Tissue paper (brown or gold)
- Decoupage medium
- Acrylic matte varnish
Take the tissue paper and crumple it. Open and using your hands try to flatten it a little. Apply decoupage medium to the paper surface. Place the tissue paper over the base paper and smooth it down with your hand or iron. Let dry.
Brush acrylic matte varnish over the surface of the paper to finish. Add a few drops of brown acrylic paint to the varnish to antique the paper.
SOAP BUBBLE PAPER
- Coated Paper
- Any kind of inks or paint
- Plastic bowls. One for each color
- Straws. One for each color
- Dishwashing liquid soap
Use the plastic bowls to prepare the mixture of water and ink or paint (1:1 ratio) and one tablespoon of liquid soap. This mixture should cover 1/3 of the bowl.
Insert the straw and blow in the mixture until you make bubbles that rise above the rim of the bowl.
Repeat the process with the other colors of ink or paint.
Now, place the paper onto the bubbles. Repeat with the other colors until the paper is cover with colorful circles and irregular shapes.
ANTIQUING PAPER
- Paper to antique (Absorbent papers work better)
- Black tea or coffee diluted in water (strong solution)
- Granulated instant coffee
- Bristle brush or toothbrush
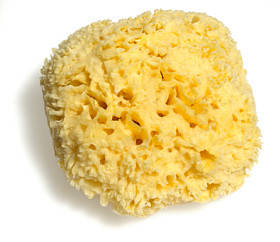
- Sponge. Sea sponge preferred
Protect your working surface with newspaper.
Prepare tea or coffee:
You can use any kind of prepared tea or coffee to obtain different results. Always start with light colors to experiment and continue with darker colors.
Antique your paper:
Position your paper to antique on top of your working surface. Use the sponge to cover the paper with the solution of tea or coffee; the coverage should be irregular.
Scatter some instant coffee granules at the top to make stronger marks.
VARIATIONS:
Dip a bristle brush or toothbrush in the tea or coffee solution. Using your thumb go back and forth to splatter the solution over the surface.
As an option, you can crumple the paper before or after antiquing, to create lines. Smooth the paper with your hands and let it dry. Once the paper is dried iron it using low heat.
As alternative, use brown or black ink instead of tea or coffee.
GILDING
Spray surface with a thin coat of spray adhesive. Let the adhesive dry enough to be tacky.
Lay the gold leaf on the surface. Brush it with a soft brush. Burnish the surface with a soft cloth.
LAYER PAPER
Use different weights, colors, sizes and textures of papers to produce a layered effect in your base paper. Also, you can use different widths of masking tape.
Use also different colors of tissue paper. Tear them into smaller pieces varying the shape and size from each other. Adhere the papers in layers using gel medium or any other glue of your preference. Apply more medium on the top of the tissue also.
After layering, you can apply gesso to some or to the entire surface. You can also use gel medium to seal everything. Let it dry and apply paint over the surface.
DISTRESS PAPER
Make the paper look older or rough by sanding it or making lines using the edge of an old credit card dipped in paint. Also, use a dry brush with a little bit of white paint to make distressed lines on the page.
All these are options to experiment and enjoy. Altering a book or a page is therapeutic and fun.
Enjoy it maybe with a cup of tea!
Glenda
Tags: altered art, ALTERED BOOK 101 SERIES, altered book tutorial, antiquing paper, antiquing papers, background textures, coffee staining, faux leather, gilding, how to alter a book, layering papers, plastic wrap, scrubbing off, scrubbing on, spattering, sponging, tea staining
This is the second part of my series about altering books. If you need to read the first part, you can find it here.
Once you have all the pages glued and dried, it’s time to start building them. The first thing you need is the appropriate background upon which everything else will be glued, written or painted.
There are different options for backgrounds. One is to cover the pages with paint partially or completely; or if you prefer, you can cover the pages with papers in a collage form.
In this step, you are going to start adding your own personality to the book. But first you need to have an idea of the content of the pages.
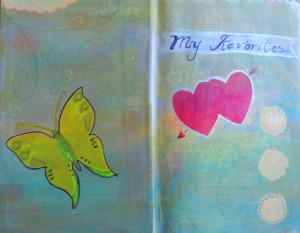
For example, I will be creating pages that represent my favorite things, so I made a list of my favorites and now I know more or less the colors of my pages. You can always add more color later also.
There are different ways to add color to the book:
Decide if you want all the wording of the page to be covered or not. Wherever you want to hide the words, apply a thin layer of gesso with a brush. I applied gesso to all my pages in this project, since I didn’t want any of the writing to appear. Also, apply gesso if your pages are too thin or delicate. The gesso will make your pages ready for any kind of paint.
1. Painting with Acrylics:
Paint directly to the pages using acrylic paints. Remember that paints can vary, and some colors are more transparent than others.
To create a translucent layer of paint, mix your paint with glazing medium; use more medium if you want the paint more translucent. You can also use water to dilute the paint. Use this mixture directly with a brush; before it dries, you can also rub off some paint using a paper towel. Add more layers if you’d like using the same color in a deeper shade or using different colors.
When you paint a page, protect the other pages by adding a piece of scrap paper before and after the pages you are going to paint (I recycle the junk mail like this).
2. Painting with Inkpads:
Inkpads come in different colors and can be used by rubbing the pages directly or by using a sponge to apply the ink on the page. I like to use inkpads on the edges of the page, just to give it more depth.
3. Use any other medium of your preference to paint your pages. Also, use different sizes of brushes, stencils, even your fingers can aide you to achieve certain effects. I challenge myself to use household things with texture to apply paint. You can use bubble wrapping by just applying paint with a brush on the wrapping material and then pressing it on the paper.
4. Look around your house and think what else you can use. What if you peel one layer of a corrugated cardboard, apply paint to the raised surface, press it to your page and use those lines for journaling?
Use your imagination; this is your book, don’t be afraid of mistakes. If you don’t like something, get some glue and paper to cover the page or apply gesso and start again.
5. Think about other ways that you can add texture to your page. Maybe you want to add some masking tape or some cutouts, squares, circles, etc. They will be covered totally or partially according to what you have in mind.
6. If you don’t want to paint the page, then you can glue papers to cover it. Cut different sizes of paper, with scissors or by hand, and start gluing them by overlapping the pieces of paper. Then, apply a wash (very runny paint) of white or any other color and paint over everything to unify the page.
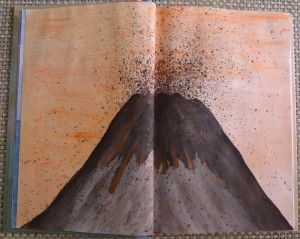
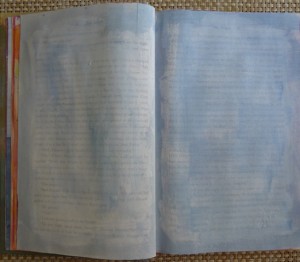
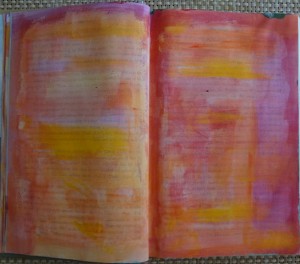
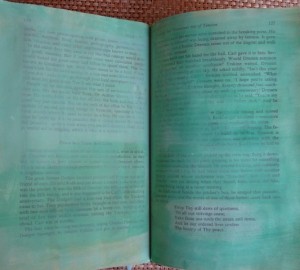
Here are some examples of my painted backgrounds, so you have an idea. These pages are not completed, I just started. I don’t know if I can declare them completed one day, we’ll see.
I used acylics, Sharpie markers for outlines, metallic markers.
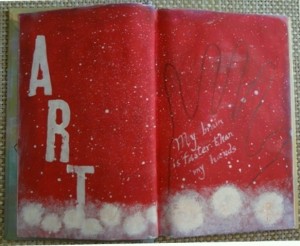
White paint, some alphabet stamps, traced my hand.
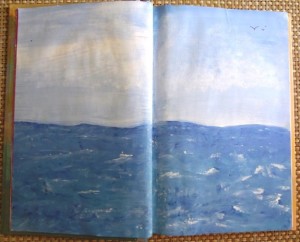
Blue and white acrylic paint to make the ocean and the sky. I mix both colors at the same time without letting them dry.
I used brown, white paint. Also, I used bronze metallic paint.
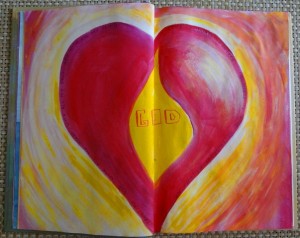
Different shades of yellow and red with white.
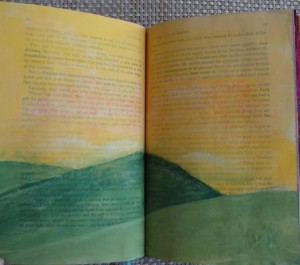
I left some text showing here.
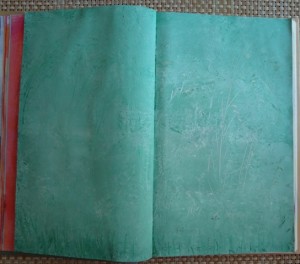
I used my knife to make marks in the wet paint.
Many times, I don’t wash my brush before I use the rest of the paint that is left in other pages. I start building color and background and at the same time; I hardly waste any paint. Here are some examples:
I hope this is inspiring to you and please let me know if you have any question or comment.
Glenda
Tags: ALTERED BOOK 101 SERIES, altered book tutorial, how to paint book pages
We started a new year my friends! Did you make your resolutions? Or at least thought about some goals? I have a few, one is to be more organized with my time. Sometimes the day goes so fast and I hardly did all the things that I wanted to do. But everyday I’m very thankful to have people in my life that encourage me and make me want to be better.
Another matter that I would love to keep in control is to scrap and journal the pictures that I have. Maybe you are in my same situation, little time and lots of things to do. Don’t feel overwhelmed (that’s what I repeat to myself); instead, try to first organize those pictures by year and month and then take them by ocassion and open Microsoft Word or any other word processor that you have, and write whatever you remember from that moment or maybe just what those pictures inspire in you now.
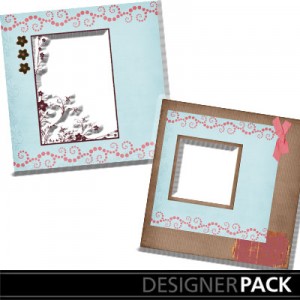
Once you have that, whenever you feel like putting those pictures and words together, grab a digital scrapbook paper and construct a layout page. To help you out, I have some free layouts that are easy to incorporate with many pictures.
And this is the link for them: http://www.mymemories.com/store/share_the_memories_kit_1
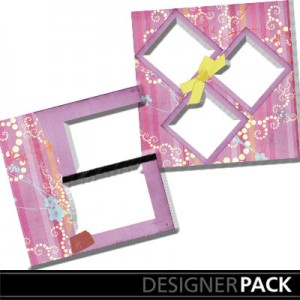
Another set is this one:
And the link to download it is here: http://www.mymemories.com/store/share_the_memories_kit_2
Here’s one more set:
And the link to download it is here: http://www.mymemories.com/store/share_the_memories_kit_3
These packs come with solid papers, tags, papers with circles, flowers, eyelets, etc.
You can collect all these papers for free! And you can use them with any program that can handle pictures. Also, you can get a more specific program, My Memory Suite. This software makes any person a digital scrapbooker, even if you don’t have any experience.
Use this coupon code: STMMMS36086 to get a $10 discount off the purchase of the My Memories Suite Scrapbook software and a $10 coupon for the MyMemories.com store – a $20 value!
We are going to have a contest very soon! Have a wonderful day and keep creating memories for the future!
Glenda
Tags: My Memories Scrapbook freebies, Scrapbook Free Layout Day
Make the Cut has a new release, version 4.1.0. This version is going to allow Mac users to work with MTC. Not just that, the other features included make this download a must if you are a MTC user or if you are planning to get the program.
To download the update Version 4.1.0 of Make The Cut, click HERE.
One of the nice new features of this update is the ability to use Open Path Font Types, also called OPF fonts. These OPF fonts are used for engraving and pen drawing. You want to get these kind of fonts when the final result that you want to achieve is single-lined letters. Usually when you use your pen to write instead of using the blade, you will get the outline of the letters, and the letters will be empty inside. These OPF letters are not going to be empty since they only have one line.
Click HERE if you would like to download five of these kinds of fonts. This is the list of fonts distributed freely by Feature Cam, and have been converted to OPF type for MTC.
- Gothic
- Grenadier
- Handscript
- Sans Serif
- Script
Download the fonts to your Desktop or any folder that you have for downloads. You can’t install them in the Fonts folder of your operating system because remember, these are different kinds of fonts. After you download the fonts, you need to install them in order to use them in MTC.
How to install the downloaded OPF fonts:
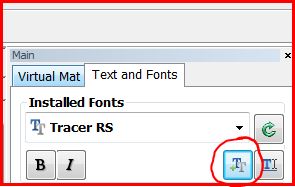
After downloading the fonts, look for the fonts in MTC. In order to do that, click on the icon at the right side of your screen that looks like a T with a shadow:
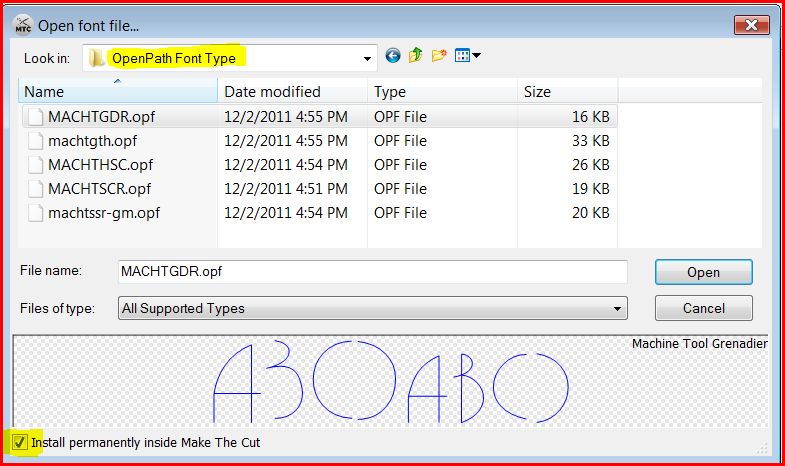
When you click on that icon, a new window will appear. Browse to where you saved the downloaded fonts. Click on the first downloaded font and also make sure you have the check mark in the lower part, where it says “Install permanently inside Make The Cut”.
Then, click on Open. Do this for the rest of the fonts. You will have all five fonts installed and ready to use with your program. You can recognize these fonts in the list of all fonts because they are in green. If you want to remove a font from the list, just click on it and press the “Delete” key.
More New Features
Another new feature that comes with the update is that now you have the option to Cancel different actions, like Break, Layer, Split. Before, when you performed any of these actions to a shape, it could take a long time and you had to wait until it finished to undo it. Now, the Cancel button is right there for you to use before the action finishes.
Another feature is the Show Registration Marks on Virtual Mat. This is very useful for the print and cut designs. Now you will be able to see the registration marks while designing on the virtual mat.
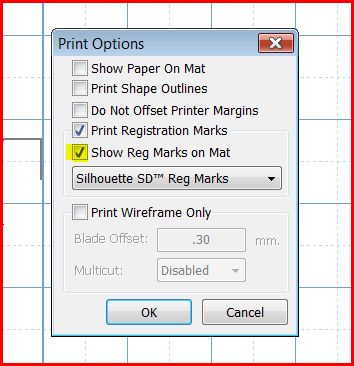
In order to make the registration marks appear, click on File, Print Options and check the “Show Reg Marks in Mat” option. The registration marks appear once you have a design in the screen or virtual mat. If you don’t want to see them anymore, repeat the same process and this time uncheck the box.
With this update, you will see also a difference with the smoothness of the cuttings.
Do you have the Silhouette Cameo? Now, you can cut directly from MTC to the Cameo with the new Silhouette Plug-In 2.0.1. To download the plug in, click HERE.
And, there is more. When you buy MTC from the link in this blog, you can get $10.00 of Enchant Art designs. Just email me the order number at glenda@enchantart.com, so I know you got it from here, and also include the names of the files that you would like to have free from the store. You choose them and I email them to you. It’s that easy!
Click HERE to buy MTC from my blog. Happy cutting to all!
Glenda
Tags: MTC, new features of make the cut, new version of make the cut
In this session we will make the book ready for writing, painting, etc. So..let’s start!
1. The first question that you need to address is your book theme. What is your book going to be about? Mine is going to be a little bit simple, there are many things happening now and I want to really enjoy my altering book time. Remember, the purpose of altering a book is to make art but also to relax in the process.
The title of my book is going to be: My favorites… or maybe just Favorites…As you see, I don’t need the exact title now since the cover is the last thing that we will decorate. I just want to have an idea of the theme.
Next, I will develop a little plan and consider more or less how many pages I need, and also, if I want to add dimensional objects; if that’s the case, I will make a niche for them.
I like to have a box, where I start collecting all the objects that I may integrate to my book (pictures, wrappers, papers, etc.) and also I put the book there, so everything is nice and organized 🙂
2. When you choose a book, remember to get a hard cover book with strong pages. The theme of the book is not important if you are planning to cover all the writing with paint or other papers. If you like the content of the book, you can leave some of that content (words or pictures) and use them as part of your completed design. We will be exploring different techniques that can be applied to the pages.
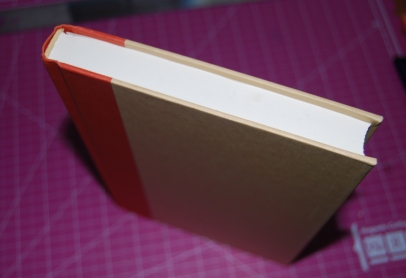
Right now, your book should look something like mine:
3. The next step is to get more room in your book for paint, ephemera, or other materials that you’d like to integrate. Since the book is already filled with pages, we need to thin it by tearing out some of the pages.
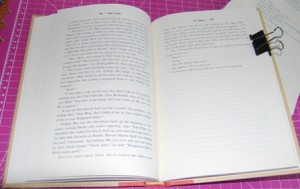
Before I start ripping out the pages, I need to decide if I will make a niche. If I do, then I leave enough untouched pages at the back of the book. I put a clip or a scrap paper to let me know where that section will start.
Then, I proceed to tear out my pages, I find it relaxing. If you prefer, you can cut the pages with a craft knife and a mat behind the pages that you want to cut.
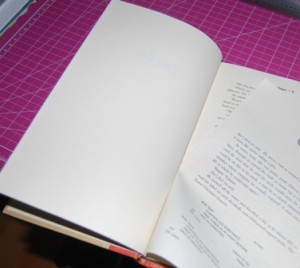
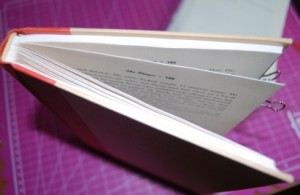
I usually follow a pattern, I leave one page untouched and tear two or three of the following pages, depending if I’m thinking on integrating thicker materials to my project or not. When I finished, my book looks like this (much thinner):
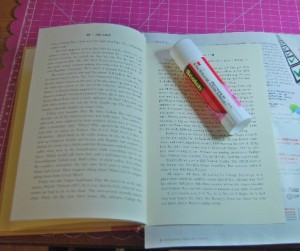
4. Depending on the book, some pages will be strong enough to have you draw or use coloring pencils or other dry materials. If you are thinking on using watercolors, or any kind of paints, I recommend strengthening the pages by gluing two pages together using a glue stick. I also hide some raw edges from the step above, by sandwiching them between two pages.
When adhering two pages together, you need to protect the pages behind with scrap paper.
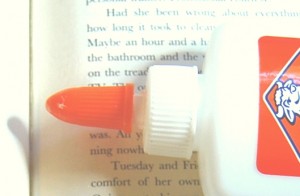
Rub the glue stick to the front of the second page, start from the spine and going outwards to the edges. Make sure to cover the entire surface. I also apply a thin line of white glue very close to the spine to strengthen the spine at the same time.
Then, take the first page and firmly, rub your palm from the area close to the spine outwards to the edges. After that, I burnish the pages with a bone folder to assure the adhesion and avoid air bubbles or wrinkles.
Do the same with the following pages, leaving alone the last section for the niche.
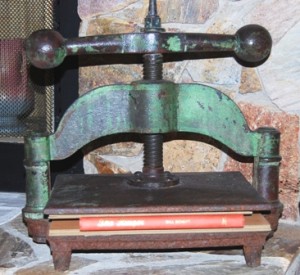
5. Once you finish adhering pages in pairs, press the book between two heavy books or boards for a few hours. I have this beautiful press, but the same results can be achieved with anything heavy on the book.
Leave this book to rest for a little. Now is the time to start selecting the color scheme, the materials you will be using and the objects to add. Don’t be afraid, this is a liberating project, remember? No stress, just fun!
If you’d like, you can start experimenting with paints. The next session we will cover the different ways to add paint and color to your pages so get ready.
Until next time!
Glenda


