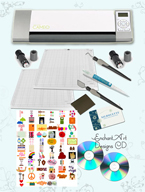
You need a mat in order to cut something using your digital cutter. That is a must, unless you are cutting something that has a backing like vinyl or card stock that you put first in the Xyron. There are some considerations about the mat. Let’s look at those: Keep your mat clean: Yes, you […]
Continue reading about Silhouette, Wishblades or Cricut Mats Maintenance
I have some tips when you use your digital cutting machine: Your machine doesn’t like sharp turns. If you have a design with sharp turns, it’s going to try to maneuver the blade in such a way that can tear your paper. If you have a design with sharp points, use a very low speed […]
Actions are pre-recorded commands that you can play back. There are some actions that come with your Photoshop and there are the ones that you create. We are going to start with the Actions included in Photoshop: Open a picture in Photoshop. Duplicate it by selecting Image, Duplicate, and then work on the copy. On […]
If you want to have some control over some of the behavior of Photoshop, look at the Preferences. Follow this instructions to make the most common changes: Open Photoshop Click on Edit, Preferences, General. A new window will open. Leave History States to 20, you don’t want to use too much of your computer memory. […]
This is another way to create a beautiful mat for your titles: Open Inkscape From the Tools, choose the Text tool. Click inside the blank paper and type your text or title. Click on Path, Linked Offset. Now you are going to see a box around your text and one, only one square. At this time I […]
Continue reading about How to Create a Fast Mat using Inkscape
I was patiently waiting for Inkscape version 0.47, the stable and final version. Last night, I got tired of waiting and downloaded 0.47 pre 2-1. Congratulations to myself!. I should have done that before. My stylus from the Bamboo works fine now and I have new tools to play with. Wonderful!! If you want to […]
I had an issue using my Bamboo stylus with Inkscape. It doesn’t work properly; the cursor disappears, lags or freezes, which can be very frustrating, making it hard to use the stylus wtih Inkscape. It looks like Inkscape only recognizes one type of input device at a time (the mouse or the stylus). In order to make your pen […]
You can add a cool edge effect to your pictures using masks. These are jpeg images that you can apply to any picture. You can make your own using brushes or you can search for “free grayscale masks for photo edge effects” on the Internet. I’ll explain how to use them: Open Photoshop. Click on File, […]
Continue reading about How to Use Grayscale Masks For Edge Effects in Photoshop
This is a lot of fun and you can do it using the Color Balance method or the Selective Color: COLOR BALANCE: From the Toolbox, click on the Elliptical Marquee Tool. Feather: 5 pixels (this can change depending on the photo that you are using). Draw a circle, making sure that you are getting inside […]
Red eye removal is fast and easy with Photoshop: From the Toolbox, click on the Red Eye Tool (you can find it in the same section as the Healing Brush). Position your cursor over the eye and click, holding down the mouse and then dragging it until you draw a square on the eye. You […]


