Today, I’m bringing another book that I made. This time it is “Rhymes”, a book about legendary small tales that go from generation to generation. I’ll explain the process that I used to put it together. You can use the same approach to make your own handmade book, customizing it to fit whatever you want to […]
Books with ornaments, especially the ones with metal details, are one of my favorite things. I thought how cool it would be to be able to attach metal corners to my handmade books. These corners are not just decorative but they protect your book also. The problem was that I didn’t know how to do […]
I’ve been busy creating new handmade books. They are perfect for a gift or just to look at them and get inspired. I created “Treasure,” inspired by romantic vintage images, papers, laces, etc. The first thing that I did was to determine the size of my book. A 6″ by 6″ size is great. Then, […]
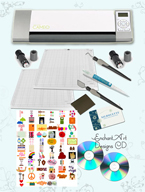
I’m sure you are anxious to see the new video from Craftwell explaining a little bit more about the machine. Please take a look and decide by yourself. I don’t think all the shapes that they show here are from the eCraft (for example the center of the flowers) but this is a good video […]
Summer 2010 is the time that Craftwelll will release the eCraft. I hope you are happy and with lots of expectations for this new addition to the arts and crafts world. Think about a digital cutter machine that won’t need the sticky mats and can cut heavy materials 12 inches wide and no limit in […]
Sharpies are like the popular and costly Copics; they are permanent markers that you can use to color your images, but cheaper than the Copics. Like the Copics, when you apply the color to a drawn or stamped image, you will be able to see the lines of the original image since the ink is translucent. […]
You can use your beautiful stamps on almost any surface; just make sure that you use the right ink and inkpad. I’m going to describe the different kinds of inks that are suitable for different surfaces. Below are the characteristics of the most common inks that you can find in craft stores: DYE INKS: Water-soluble […]
Continue reading about Inks and Inkpads Types: Which Should I Use?
I’m a researcher who spends hours looking for information, and at the same time I try to invest my money in tools that justify their price. I like to buy tools that are efficient and durable (almost industrial). The Cinch is one of the best investments that I can think of. Using the Cinch, I can make […]
You can create interesting backgrounds by using rubber cement before applying ink to the surface. For this technique, you need: Rubber Cement Card stock Brush Ink Pad (color of your preference) Take the cardstock or any other surface where you want to apply the effect; using a brush, apply rubber cement over the cardstock, making […]
Continue reading about Rubber Stamping: Rubber Cement Resist
You can use prepasted wallpaper to add accents to your projects. Wallpaper comes in different and fun designs. For example, look at this very cute wallpaper of animals: It is very easy to use prepasted wallpaper. Just cut the images that you want to use. Place the cutouts on your project to see how they look […]


