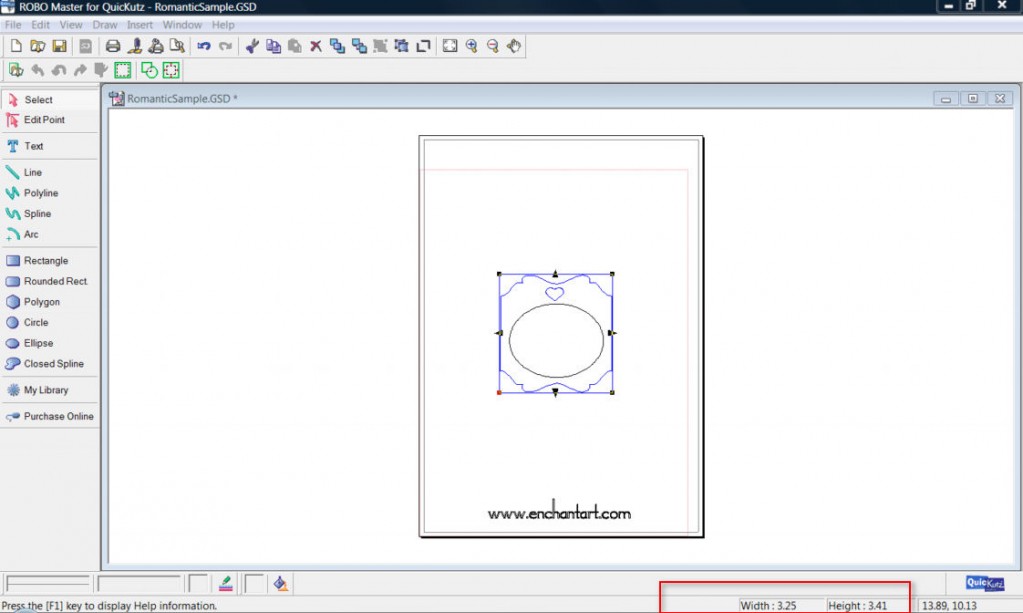
This may sound basic, but it’s important to know. I want to write about the different ways that you can change the size of an image. First we need to know the actual size of an image and then how to resize it:
- Open a file or choose an image from My Library.
- Once it’s open, make a click on it in order to select the image. The image is going to have a blue box around it.
- Look at the bottom right corner of the screen and you can see the information about the Width and Height of the box that is around the image.
- Another way to know the size of your image is by righ-clicking on the image and choosing Position Settings…

- Once you know the correct size of your image you can change it to the desired size, using one of these methods:
- With your selected image you’ll see a blue box around it. This box has four small squares at each corner and four triangles. You can click on one of any of these small squares, hold the click down and drag to resize the image keeping its proportions. If you want to resize the image altering the original proportions, use the triangles instead. When you click and drag either square or triange you can see the changes for the Width and/or Height in the bottom right corner of the screen.
- The other way to resize the image is to right click on it and choose Position Settings. Then, change the amounts for Widht and Height. If you want to keep the proportions, check the box for Hold Aspect Ratio and click OK.


