The structure of the piano hinged book is intriguing and since I like experimenting, I decided to learn more about it. If anybody tells you that making this book is super-easy, don’t believe them. It presents its own challenges.
First, I like to make my own version of everything. So I had to create my own template. Then, I had to make sure that everything (covers and inside pages) fit well. And lastly, that the book was easy enough so anybody with a little bit of interest could make it.
Putting all these elements together and after many attempts, I came out with this book:

I used pastel-colored papers, wooden skewers, ribbon and decorative cardstock for the front and back covers.
The first thing was to paint the skewers with gold acrylic paint and some glitter paint. I let them dry. Meanwhile, I worked with the template, making sure I had an even number of notches to go through with the skewers. If anybody is interested in the template, let me know. Otherwise, I’ll explain:
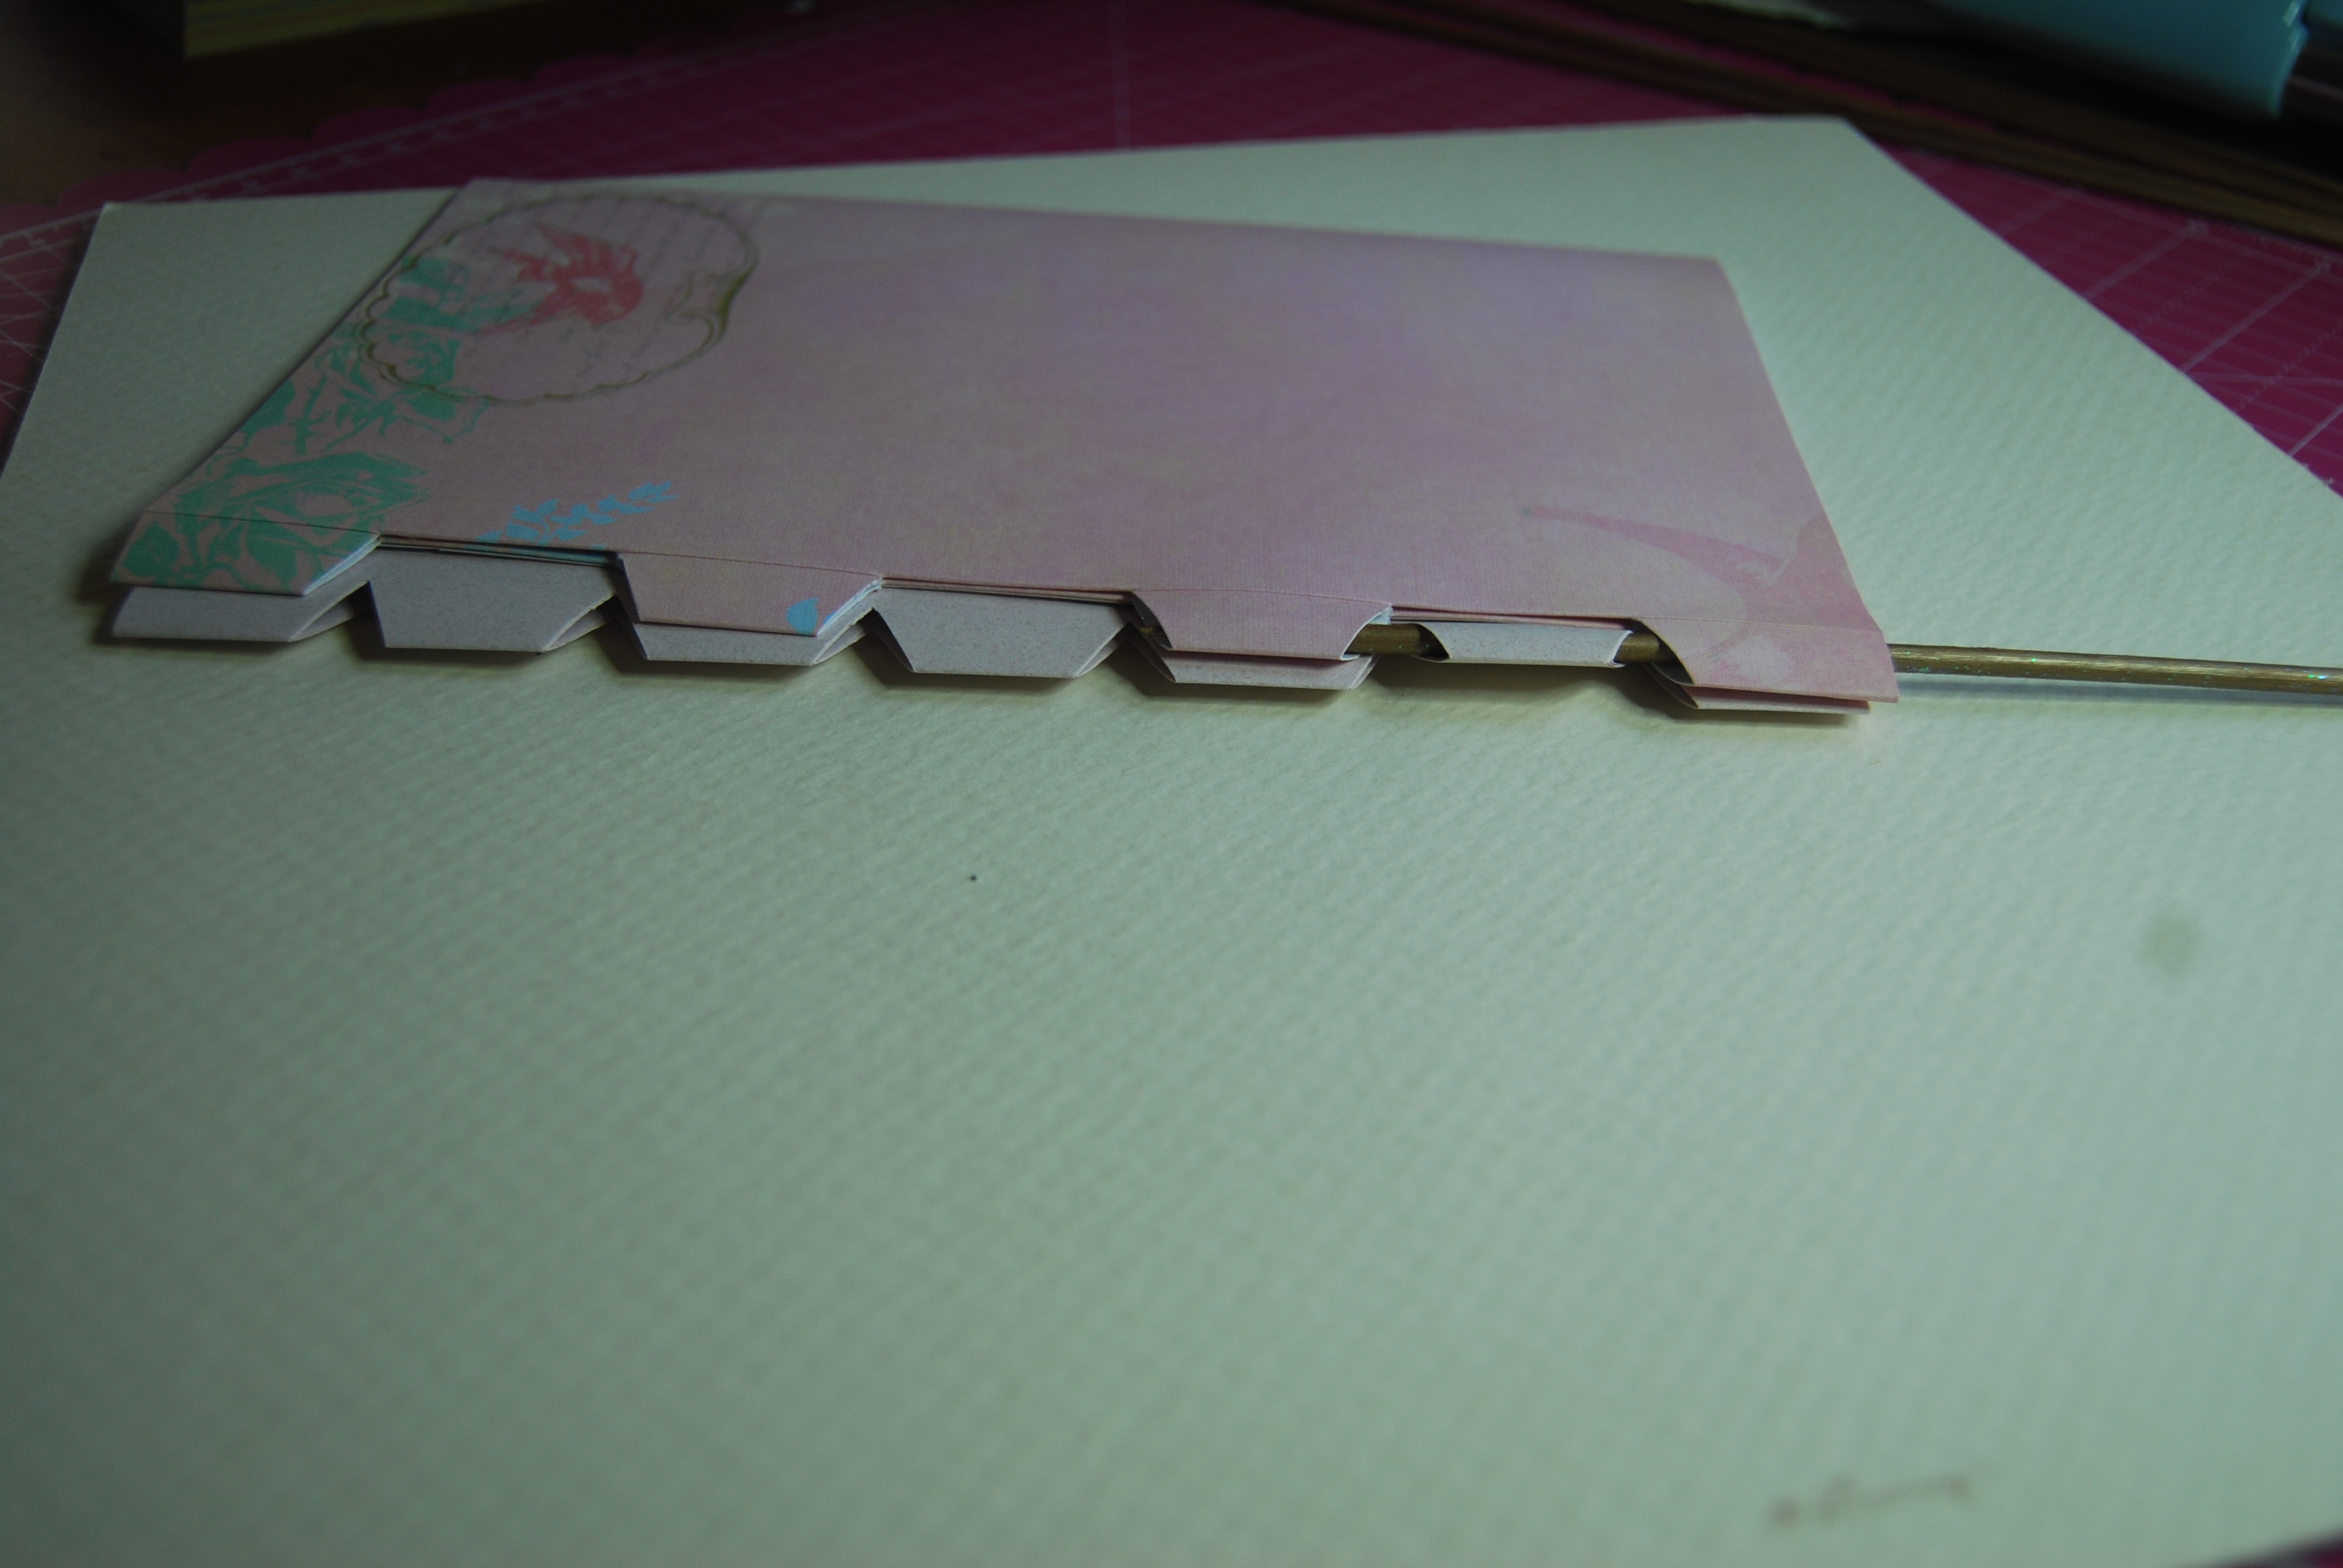
Basically, you will fold your letter size paper in half and using the folded side of the paper, make 3/4′” and 1/2″ marks. Then, cut triangles between the 1/2″ marks. This is the template that you will use to cut all your pages.

After you cut all the pages and covers, you are ready to assemble your book.

Insert the skewer in the first tab from the cover, then to the second tab of your first paper, third tab of the cover, fourth tab of the paper, fifth tab from cover, sixth from paper and finish with the seventh tab from cover.
Do the same with a third page. Add as many as you need.
Also, instead of using one sheet of paper or cardstock, you can use three or four grouped together. These are called signatures and are more convenient if you need or want more pages.
Then, I weaved some ribbon at both endings of the skewers and added an angel charm at the top.

You can see more details of this book here. Any questions, please let me know.

Tags: handmade books, Piano hinged book
|
|


