We continue with the Altered Book 101 Series. This time, I would like to explain more about how to change the background of a page using different techniques.
Some of the same faux painting techniques for the walls, can be applied to the papers.
SPONGING
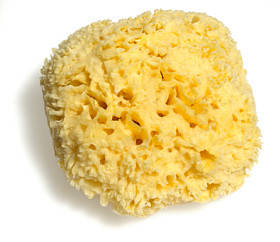
- Sponge: Natural or man-made
- Acrylic paint thinned down with water or acrylic extender
- Disposable plate
Pour some thinned paint on a disposable plate. Damp the sponge with water and squeeze out excess. Lightly, press sponge on the paint and dab the excess on a paper towel.
Pounce the sponge on the paper several times and changing the position of your hand in order to create random designs.
Add another color if desired. For a faster application add two colors to the sponge at the same time just make sure not to mix the colors too much.
SCRUBBING OFF
- Acrylic paint(s)
- Bristle Brush
- Baby wipes
Apply the acrylic paint to the paper using a dry brush. Immediately, rub the surface with a baby wipe to remove some of the paint on the paper. Use more baby wipes and use a dabbing motion to remove more paint in certain areas of the paper.
Add more paint of the same color or other colors to achieve more depth or texture.
SCRUBBING ON
- Acrylic paint(s)
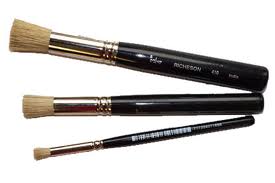
- Stencil Brush
Apply thinned acrylic paint to paper using a stencil brush. This method allows you to create more soft layers of paint by scrubbing the paint on the paper using circular motion.
TEXTURE WITH PLASTIC WRAP
- Paints diluted with water
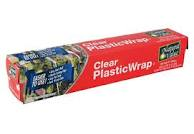
- Plastic wrap
Paint the paper with the acrylic paint, use more than one color if you wish.
Place the plastic wrap on the paper and using your hands, crumple the plastic wrap to the desired pattern.
Let it dry and remove the wrap from the paper.
OLD WORLD FLAVOR
- Thick paper
- Acrylic colors
- Old credit card or knife
Create the looks of old walls using paint and scraping it on the papers’ surface using an old credit card.
Using thickener paint medium you can make the paint look more raised and add more texture to the paper.
If you want to add more than one color, wait until the paint is dry and apply the other color to the paper. Another option is to work with wet paints to achieve a softer transition blending the areas where the different colors of paint blend together.
SPATTERING
- Paper
- Paint (acrylic or watercolor) thinned down with water or acrylic extender
- Brush (tooth brush or old stiff art brush)
Cover the surface where you are going to work with scrap paper or newspaper to protect your work surface. Thin paint with water accordingly to the effect that you want to give to the paper.
Dip the very tip of the brush into the paint and using your finger or an old credit card, pull the bristles towards you and targeting the paper. Once the paint is dried you can apply another color over the first one.
VARIATION:
- Before spattering lay a stencil or any object over the paper to create a mask. The area covered with the stencil will remain in the original color contrasting the spattered area.
- Use an atomizer to spray fine dots of paint on paper or adjust the nozzle to apply more paint at a time.
FAUX LEATHER
- Paper
- Tissue paper (brown or gold)
- Decoupage medium
- Acrylic matte varnish
Take the tissue paper and crumple it. Open and using your hands try to flatten it a little. Apply decoupage medium to the paper surface. Place the tissue paper over the base paper and smooth it down with your hand or iron. Let dry.
Brush acrylic matte varnish over the surface of the paper to finish. Add a few drops of brown acrylic paint to the varnish to antique the paper.
SOAP BUBBLE PAPER
- Coated Paper
- Any kind of inks or paint
- Plastic bowls. One for each color
- Straws. One for each color
- Dishwashing liquid soap
Use the plastic bowls to prepare the mixture of water and ink or paint (1:1 ratio) and one tablespoon of liquid soap. This mixture should cover 1/3 of the bowl.
Insert the straw and blow in the mixture until you make bubbles that rise above the rim of the bowl.
Repeat the process with the other colors of ink or paint.
Now, place the paper onto the bubbles. Repeat with the other colors until the paper is cover with colorful circles and irregular shapes.
ANTIQUING PAPER
- Paper to antique (Absorbent papers work better)
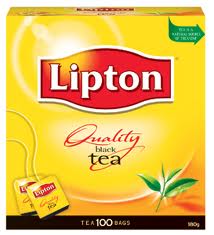
- Black tea or coffee diluted in water (strong solution)
- Granulated instant coffee
- Bristle brush or toothbrush
- Sponge. Sea sponge preferred
Protect your working surface with newspaper.
Prepare tea or coffee:
You can use any kind of prepared tea or coffee to obtain different results. Always start with light colors to experiment and continue with darker colors.
Antique your paper:
Position your paper to antique on top of your working surface. Use the sponge to cover the paper with the solution of tea or coffee; the coverage should be irregular.
Scatter some instant coffee granules at the top to make stronger marks.
VARIATIONS:
Dip a bristle brush or toothbrush in the tea or coffee solution. Using your thumb go back and forth to splatter the solution over the surface.
As an option, you can crumple the paper before or after antiquing, to create lines. Smooth the paper with your hands and let it dry. Once the paper is dried iron it using low heat.
As alternative, use brown or black ink instead of tea or coffee.
GILDING
Spray surface with a thin coat of spray adhesive. Let the adhesive dry enough to be tacky.
Lay the gold leaf on the surface. Brush it with a soft brush. Burnish the surface with a soft cloth.
LAYER PAPER
Use different weights, colors, sizes and textures of papers to produce a layered effect in your base paper. Also, you can use different widths of masking tape.
Use also different colors of tissue paper. Tear them into smaller pieces varying the shape and size from each other. Adhere the papers in layers using gel medium or any other glue of your preference. Apply more medium on the top of the tissue also.
After layering, you can apply gesso to some or to the entire surface. You can also use gel medium to seal everything. Let it dry and apply paint over the surface.
DISTRESS PAPER
Make the paper look older or rough by sanding it or making lines using the edge of an old credit card dipped in paint. Also, use a dry brush with a little bit of white paint to make distressed lines on the page.
All these are options to experiment and enjoy. Altering a book or a page is therapeutic and fun.
Enjoy it maybe with a cup of tea!
Glenda
Tags: altered art, ALTERED BOOK 101 SERIES, altered book tutorial, antiquing paper, antiquing papers, background textures, coffee staining, faux leather, gilding, how to alter a book, layering papers, plastic wrap, scrubbing off, scrubbing on, spattering, sponging, tea staining
