This tutorial is for the owners of a Silhouette machine who wants to incorporate their own digital papers to any shape using the free software that comes with the machine, Silhouette Studio.
I must have hundreds of digital papers that I’d created or that I’d downloaded from the internet. I wanted to use those gorgeous papers with my shapes. If you were trying to figure out how to do this with the upgraded software, these are the steps to follow:
1.- Open Silhouette Studio
2.- Click on File, Open. When the Open window appears, click the arrow for “Files of type” and choose “All Files” from the list.
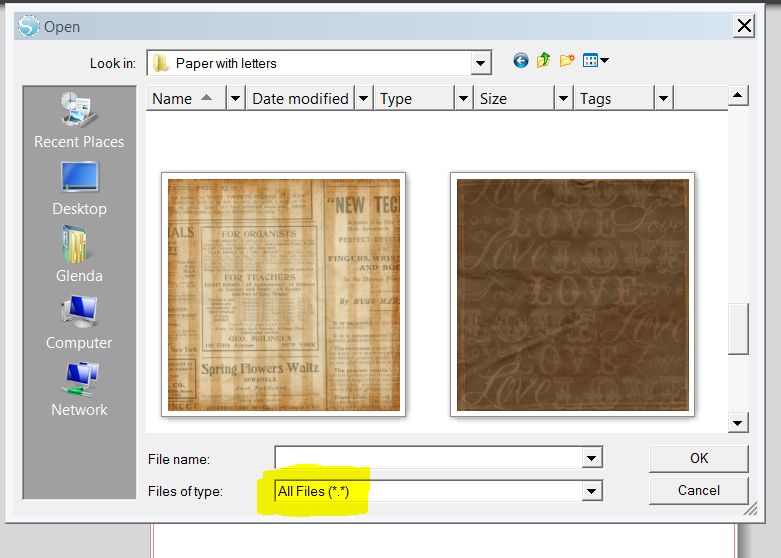
3.- In the “Look In” at the same window, look for the folder where you store the digital paper that you’d like to add to your shape. Now, you will be able to see all the files in the folder, including the .jpg and .png., which are usually the formats used for creating digital papers.
4.- Double click on the paper that you want to bring to the Silhouette Studio program.
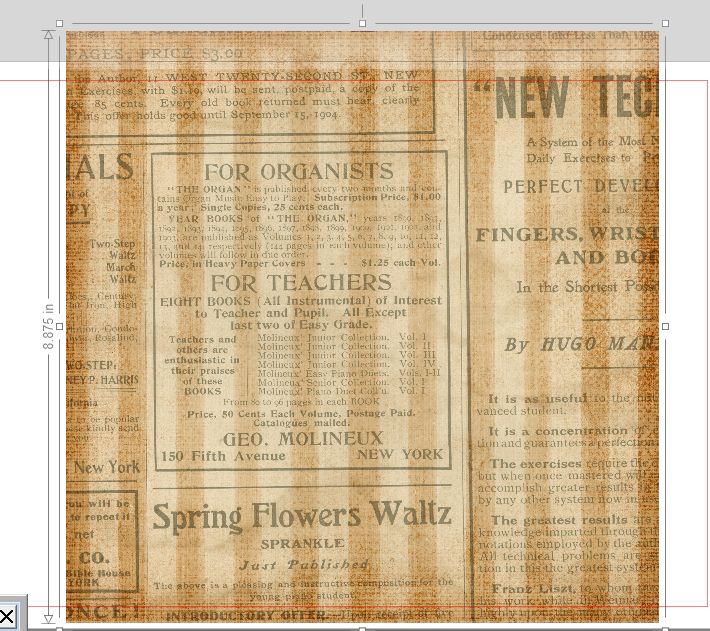
5.- If you want to change the size of the paper, click on the paper and grab one corner of it, without letting go of the mouse, bring the corner to the other side. Adjust accordingly.
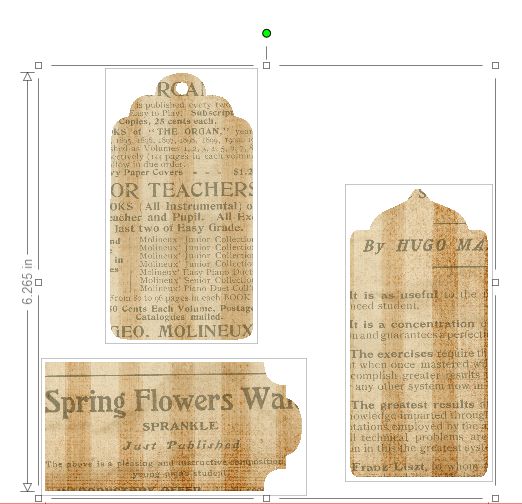
6.- Now, it’s time to bring the shape you’d like to cut to the program. You can open it from the Library or you can bring it from the computer. For this example, I have three tags from the Everyday Tags.
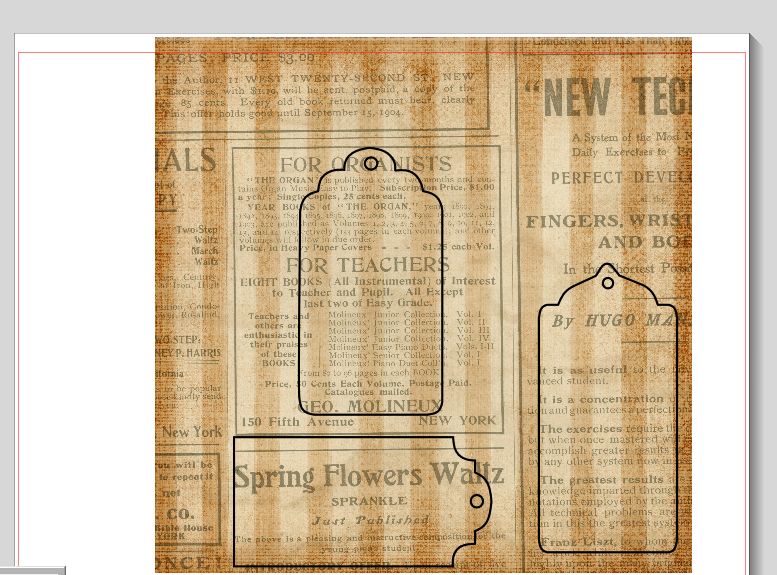
7.- Once you open a shape, you will see the lines of it on top of the paper. Move the paper or the shapes according to your taste.
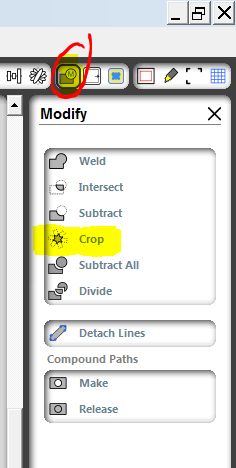
8.- Now, you need to select everything, to do that, click outside the paper and shape, hold down the mouse and drag it around them. Also, you can press Ctrl and without letting it go press the letter A in order to select all.
9.- At the right side of your screen, there is a group of icons at the top. Click on the icon that has a rectangle with a letter M. That opens the modify menu. Click on the “Crop” alternative.
10.- If you follow all the steps, your final result is the shape filled with the paper.
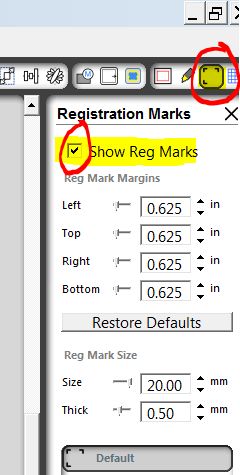
11.- This is ready for Print and Cut. Just click on the icon that has three corners, that will allow you to check the option for “Show Reg Marks”. Send your creation to your printer, File, Print.
Once printed, put the paper in the Silhouette mat and proceed to Cut as always. Silhouette is going to identify your registration marks and cut the shapes.
If you have a question, please post it here and I will respond to you.
Happy cutting!
Glenda

Tags: designers papers with Silhouette, HOW TO ADD DIGITAL PAPERS TO SILHOUETTE SHAPES
|
|


