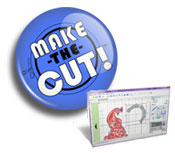
If you want to use the Grids with your software, you can find it on Edit, Grid Settings. The Grid Spacing is 0.50 inches. You can change it to any size.
Sometimes, when you scan a photo, you’ll see a pattern over all the image. In order to correct this, you can try to blur the blue channel doing the following: With your image open in Photoshop, click on the Channel tab and click on the Blue Channel. Click on Filter, Blur, Gaussian Blur. The Gaussian […]
Continue reading about Removing Patterns from Scanned Photos
You can trace an image and convert that image from .jpeg or .bmp into a file that can be used by your digital cutter machine (like Quikutz Silhouette). Please follow these steps: Click on File and Import. Look for your image, click on it to select it and click on Open. You should be able […]
Let me tell you first what is Inkscape: It is a vector-based software just like Illustrator. You are not dealing with pixels like Photoshop, so everything that you draw is going to keep those sharp edges even if you increase the size of your shape. You can use it to auto-trace .jpg and .bmp images and use these […]
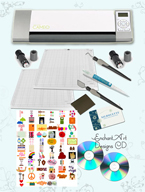
My machine arrived! It’s not as big as I thought, and that’s good, I like to save space in my home. If you are blessed with one, these are my suggestions: Open the box and make sure everything is there. Read the instructions. Install the program that comes in the included CD (follow instructions). Go […]
I have several good reasons to get this machine: I like cutting things but I don’t have the patience to cut intricate designs by hand. I use my laptop for cardmaking and scrapbooking. I don’t like to buy expensive cartriges of designs or bulky die cuts that other cutters need. I want to have the […]
If you want to change the cursors, the size of the Grid or the Ruler settings without going to Edit, Preferences, just double-click on the ruler. You will have access to all the editing options from there.
Continue reading about Quick way to access the Preference Dialog Box
Select File, Open and choose a photo that you want to use as the filling for your text. Select the Text tool and a large size font (Arial bold or something like that) Type your text. Photoshop is going to create a Type layer. Select the Move tool and position your type. Also, change the […]
You can make your own brad and change the color of it whenever you need to. To make your own brads in Photoshop, follow these steps: Go to File, New. For the Width and Height, choose 2 inches, the background shoud be transparent, the resolution 300 pixels/inch. Now click on the Marquee Tool and while holding down […]
If you are planning to put your photos on the Internet and provide them some protection against piracy, you may want to add the copyright symbol to them. Follow these steps: Create a New Document. Press D to make your foreground color Black. Choose the Type tool and select Arial Bold. Press Alt + 0169 to […]


